








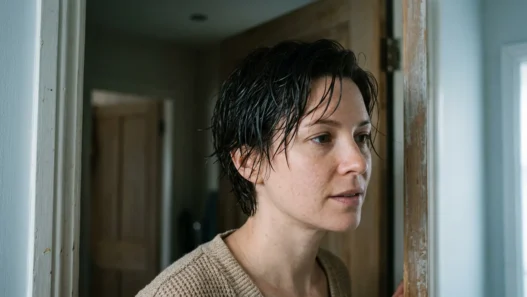


Growing out a pixie is the haircut decision that nobody really warns you about. You cut it, you love it, and then about six weeks later you’re standing in the bathroom mirror holding a diffuser in one hand and a bobby pin in the other, wondering what on earth is happening to the sides of your head. I’ve been there twice. The first time I just white-knuckled through it with headbands and mild resentment. The second time I actually talked to my stylist about shapes — not just “grow it out” but specific constructions that pass through wearable silhouettes on the way to longer. That conversation changed everything. What I’m sharing here are the nine shapes I’d actually recommend, described in terms of where the weight sits and what they cost you every single morning.
One thing before we get into it: the whole point of choosing a grow-out shape is to reduce internal contrast. A pixie has a specific weight distribution — short at the nape and sides, sometimes longer on top. As those sections grow at different rates, you get bulk in weird places. The shapes below are chosen because they channel that new growth into a silhouette that reads intentional rather than neglected. Some of them ask very little of you. Some look deceptively simple but actually need product every day. I’ll be straight about which is which. You can also browse the wider category of short cuts on Satinmane for more context on what sits in this territory.
1. The Soft Taper with Length Left on Top
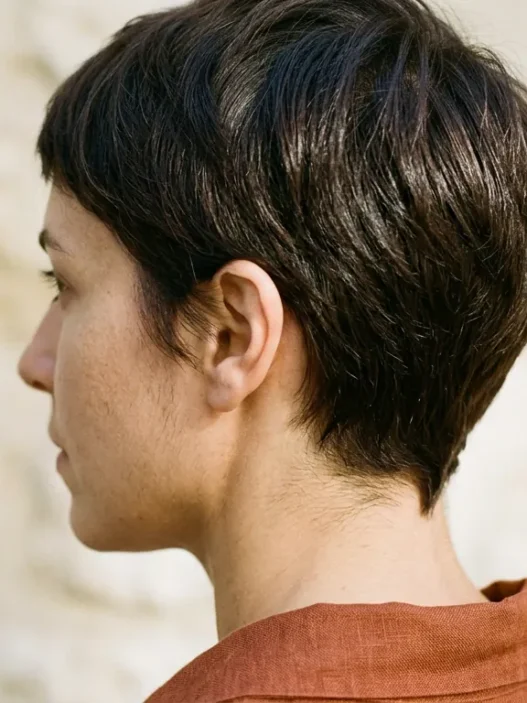
This is where most pixie grow-outs should start, honestly. The stylist keeps the taper tight at the nape and around the ears — really clean graduation through the occipital bone — while leaving the crown and top intentionally longer. We’re talking maybe two to three inches on top by the time you’re at the six-week mark. The weight line sits across the top of the head rather than falling to the sides, which prevents that mushroom situation that makes people panic and get it all cut off again.
It suits almost everyone, but it especially works for women with finer hair because the length on top creates the illusion of volume without relying on actual thickness. What it asks of you in the morning: a small amount of pomade or paste worked through the top, maybe a finger-diffuse if you want texture. That’s genuinely it. Three minutes max. The sides stay clean on their own for a good four to five weeks between trims.
What to say at the chair: “Keep the taper tight below the occipital — I want zero bulk there — but leave the top alone. No scissor-over-comb on the crown.”
2. The Textured French Crop
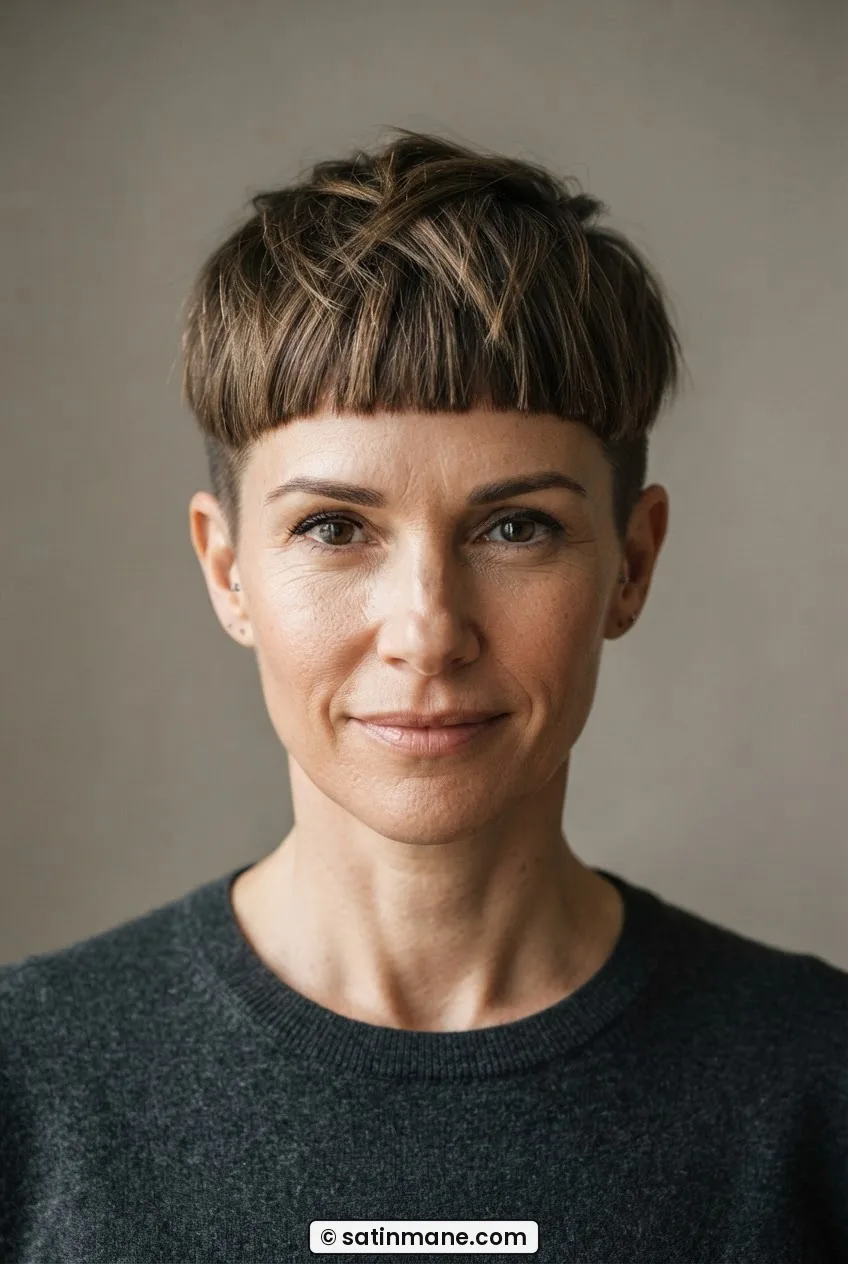
The French crop is a specific construction: disconnected, with a blunt or point-cut fringe that sits across the forehead, and the sides either faded or scissor-tapered very close. The top is left longer — enough to push forward into that horizontal fringe line. During a pixie grow-out, this shape works brilliantly because the new length on top gets directed forward and cut into the fringe, which gives it purpose rather than just looking like overgrown volume with nowhere to go.
I want to be honest here: the texture part matters. If you let this air-dry without touching it, it looks like a child’s bowl cut from 1994. You need either a quick blast with a dryer and a flat brush to push the fringe forward, or a paste — actual paste, not a serum — to define the ends. It’s not a wash-and-walk cut. But the payoff is that it looks incredibly sharp, and it reads very intentional even at eight weeks’ growth.
Works especially well on straight to slightly wavy hair. Trickier on curly hair because the fringe will lift rather than lie flat. For round face shapes, check out what the honest guide to short haircuts for round faces says about fringe placement before committing to this one — fringe length and angle matter a lot on a round face.
What to say at the chair: “Disconnected on the sides — I want a visible line, not a blend. Fringe cut blunt or point-cut just above the brows. Keep enough length on top to push it forward.”
3. The Grown-Out Shag
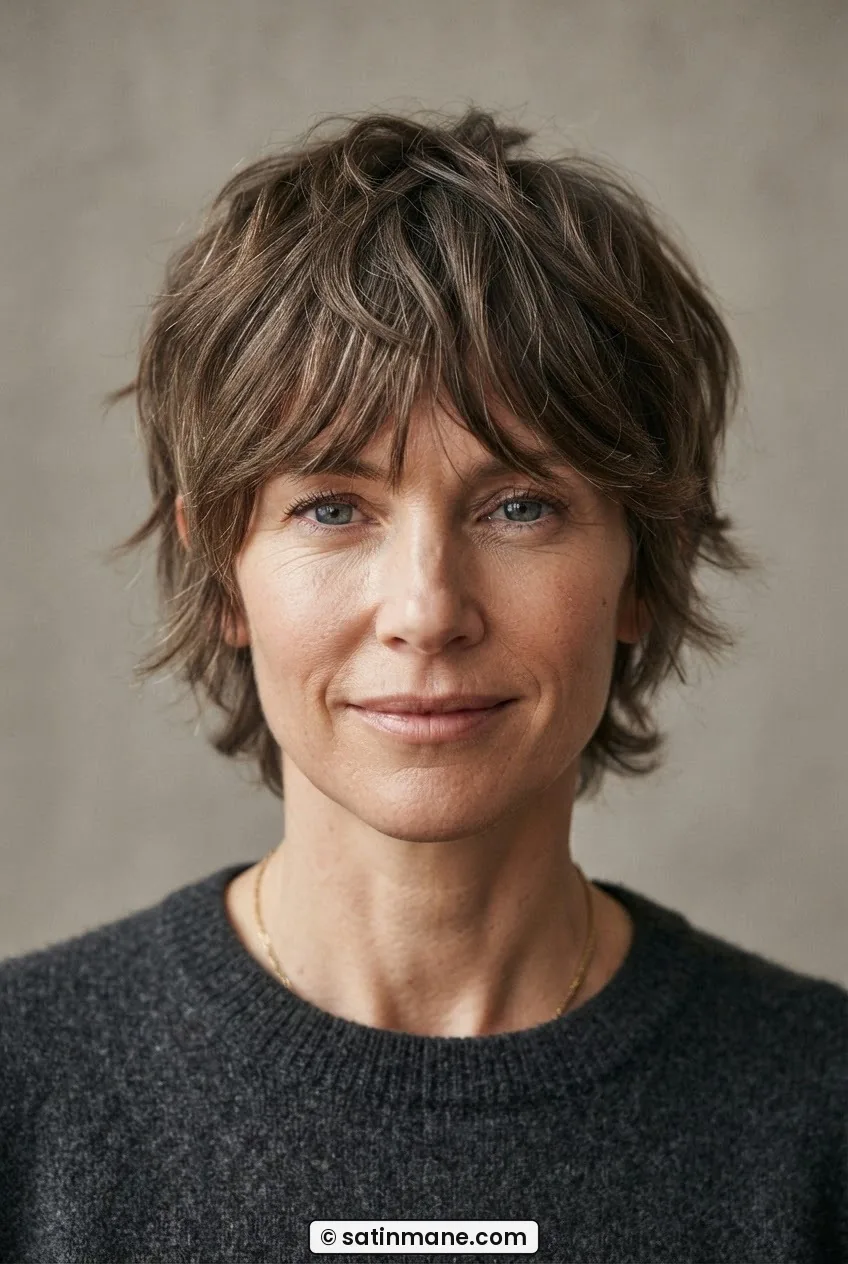
This one is the shape I personally find most exciting to grow into, because a shag is essentially designed to look slightly undone. The construction involves razor-cut or point-cut layers throughout, heavy disconnection between the top layer and the under-layers, and — crucially — a lot of texture removal from the ends. When a pixie grows out into this, the stylist is strategically thinning and layering so the new bulk becomes movement rather than a blob.
My personal pick for women with naturally wavy or fine-but-plentiful hair. The shag channeled my second grow-out in a way nothing else would have — by week nine, people were asking if I’d meant to cut it this way. The answer was sort of yes.
Look at the way she wears hers in the photo — that slightly tousled, lived-in quality at the crown is not an accident. That’s what a correctly cut shag does with air-dried texture. It’s honestly one of the lower-effort shapes once it’s cut correctly, because the texture is the style. Salt spray, scrunch, done. What it is not good for: if you have very fine, limp hair that doesn’t hold any wave, the disconnection can look patchy rather than textured.
What to say at the chair: “I want a shag grow-out. Point-cut the ends throughout, remove interior weight especially through the sides, and give me a curtain fringe if there’s enough length.”

4. The Side-Swept Fringe Transition
Sometimes the hardest part of growing out a pixie isn’t the back — it’s the front pieces that hit an awkward in-between length and refuse to do anything useful. This approach leans into that. Instead of fighting the front pieces, the stylist cuts them long enough to sweep across the forehead at an angle, creating a side-swept fringe that disguises the transition entirely.
The construction here is about a graduated line from longer at the part side to shorter at the temple. The back and sides can stay relatively close-cut; the whole visual interest lives in that diagonal across the front. It takes about thirty seconds to style — a quick swipe of a round brush or even just fingers to set the direction, then a spritz of light-hold spray. Repeat as needed through the day if it migrates. This is genuinely one of the lower-effort options, and it works across a surprisingly wide range of face shapes because the angle creates length.
What to say at the chair: “Leave the front long enough to sweep across — I want a diagonal fringe line, not a straight one. Keep everything else close.”
5. The Ear-Length Rounded Bob
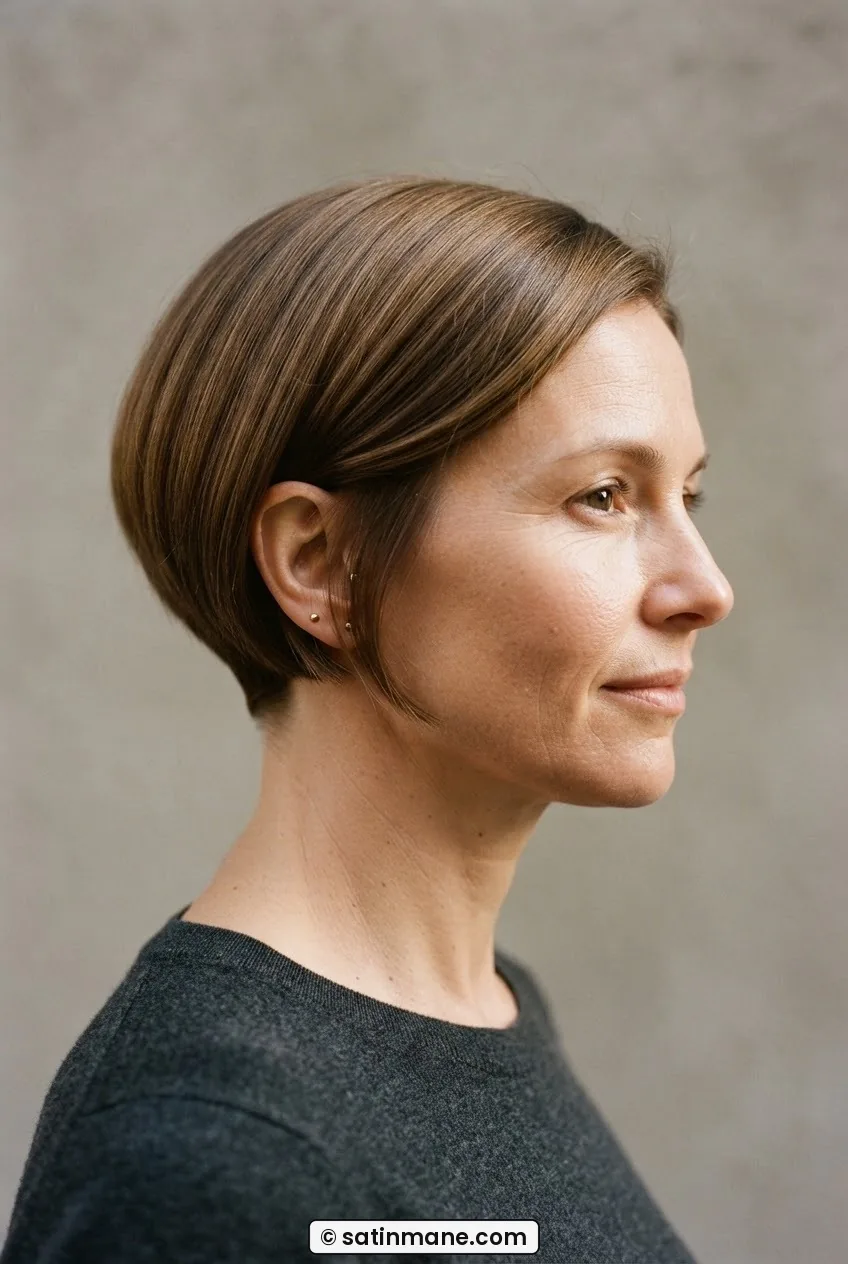
This is the shape most people think of when they imagine the “pixie to bob” journey — but the execution is everything. A rounded bob at ear length has a curved weight line that follows the head shape from nape to jaw. The interior is graduated so the hair lies close and smooth rather than puffing out, which is the enemy of the grow-out stage.
What makes this different from just letting a pixie grow: the stylist is actively removing bulk from the nape and sides while allowing the length to accumulate only where the rounded silhouette needs it. It’s a periodic trim shape — you’re in the chair every six to eight weeks keeping the curve precise. Let it go longer and the graduation collapses into a shapeless mid-length that looks like nothing in particular.
Morning effort is moderate. Smooth hair will air-dry into this shape reasonably well. Curly or wavy hair needs either a diffuser or a quick blowout with a round brush to hold the curve. For women with a round face, I’d angle the bob slightly so the front is longer than the back — pure rounded bobs can close the face in. For other face shapes, the classic version works beautifully.
What to say at the chair: “Rounded bob at ear length — I want the weight line following the curve of my head, with graduation through the nape, not a stacked or blunt line.”

6. The Undone Wavy Crop
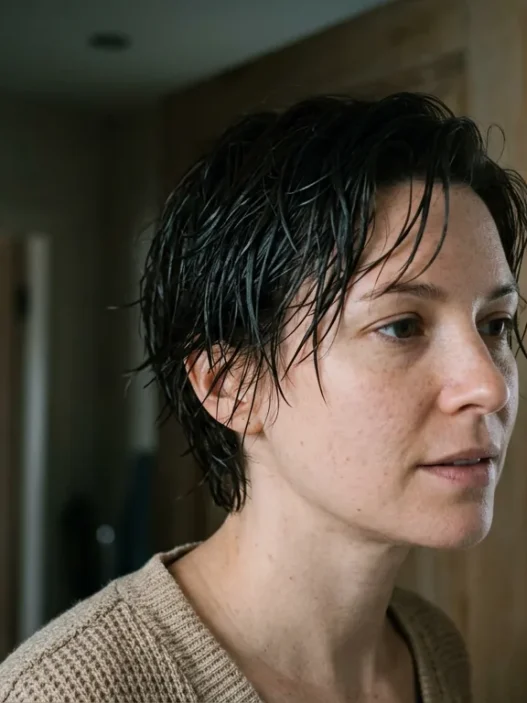
This one only works if you have natural wave or are willing to do something about it. The construction is a longer crop — probably two to three inches everywhere — with the ends heavily point-cut to remove the hard line. There’s no tight taper; everything is softer and more diffused. The whole shape relies on the hair doing its own thing and the cut making that look considered.
She’s wearing hers in the photo with that effortless tousled texture — but I want to be clear, that’s not just air-drying. That is salt spray applied to towel-damp hair, then either finger-scrunching or a diffuser on low. Without the product, straight-ish hair in this construction looks shapeless. With it, genuinely lovely. For anyone with natural wave or curl, this is actually the one that asks least of you, because the natural texture is the structure.
Probably not the move if you have very straight hair that resists texture. Adding texture to fine straight hair is worth reading if you want to know whether this is achievable for your hair type before committing to the cut.
What to say at the chair: “Leave it longer all over — two to three inches — and point-cut the ends throughout. I want diffused, not blunt. No defined taper.”
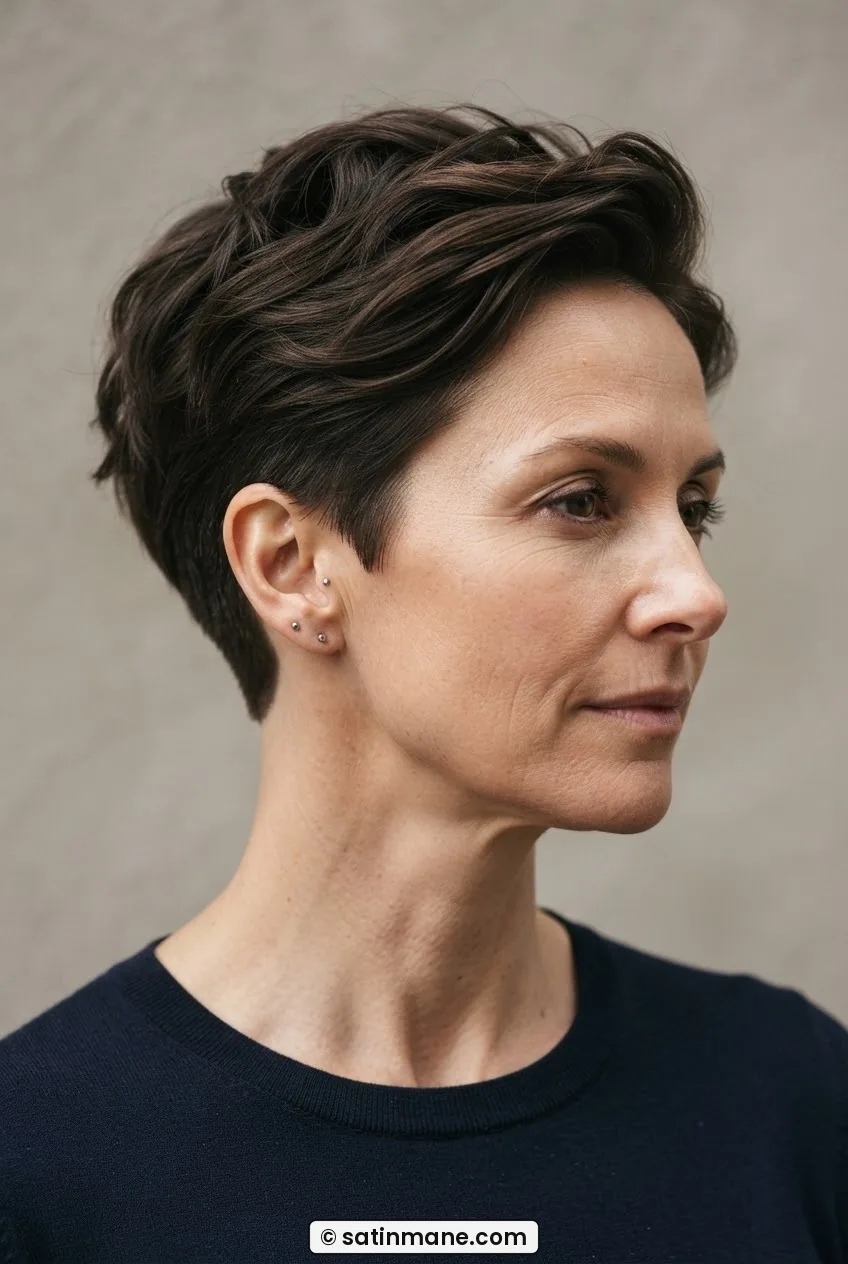
7. The Defined Nape with Longer Crown
Essentially the inverse visual of the French crop. Here, the nape is kept very clean — either edged up or lightly faded — while the crown is left to accumulate length. This works particularly well if your hair is growing out unevenly: if the sides are racing ahead of the top, a clean nape edge immediately makes the whole thing look intentional and considered rather than overgrown.
The crown length can be styled in multiple ways as it grows — forward, swept back, or loose — which gives you options at different stages rather than one fixed look. The catch: you need that nape tidied every three to four weeks. Not a full cut, just a quick cleanup. If you’re someone who only visits the salon every eight weeks, the nape will start to look soft and unfinished and the whole construction loses its point.
What to say at the chair: “Keep the nape really clean and defined — I want a clear edge. Leave the crown long and don’t touch it. Just clean up around the ears.”

8. The Blunt Chin-Bob Bridge
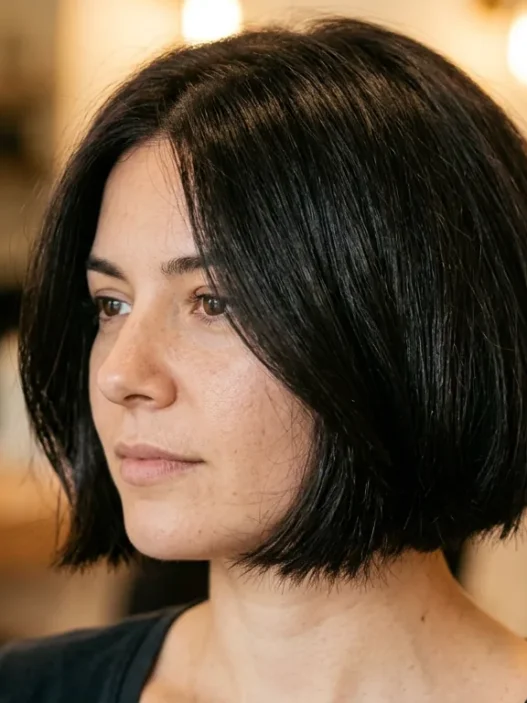
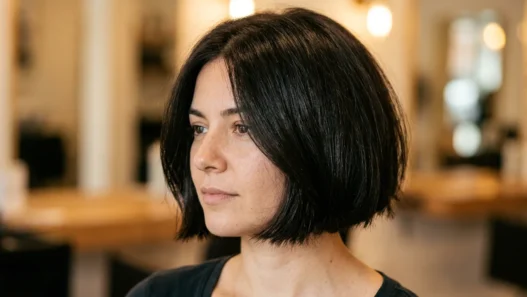
This is the late-stage grow-out option — you’re probably at four to five months from a true pixie before this becomes available to you, and the wait is worth it. A blunt chin-length bob is cut with a solid weight line at the jaw, interior graduation through the nape so the bob sits rather than flares, and minimal layering so the blunt perimeter is the entire point.
It’s a shape that reads extremely polished. Almost severe, in the best way. The construction holds up to about six weeks between trims before the blunt line starts to look grown rather than deliberate. If you have thick hair, the graduation through the interior is non-negotiable — without it, the bob will triangle out. For fine hair, the bluntness adds the illusion of density. You can see in the photo below exactly how the blunt perimeter sits — that line at the jaw is doing all the work.
Morning effort is real. This shape wants a blowout or a smooth air-dry, not a scrunch-and-go. It’s worth knowing what blowdrying a chin-length bob actually requires before you commit — some people find it genuinely fast; others find a round brush and heat every single morning exhausting. Be honest with yourself about that before you pick this one.
What to say at the chair: “Blunt chin-length bob. I want a solid perimeter — no soft or point-cut ends. Graduated through the nape, no layers above the weight line.”

9. The Low-Manipulation Bixie
The bixie — somewhere between a pixie and a bob, typically sitting between the ear and the chin — has become a genuine holding shape for people mid-grow-out. The construction varies, but the version I’d recommend for hairstyles for growing out a pixie specifically is a longer, softer bixie with point-cut ends throughout and no hard graduation. The length falls loosely rather than curving into a precise bob, and that looseness is what makes it workable at multiple stages of growth.
It’s called low-manipulation here because when it’s cut right — soft ends, no rigid perimeter — it genuinely doesn’t need much. You can air-dry this. You can add a small clip to one side when the front gets long. You can scrunch in some product and call it a textured day. You can finger-comb after sleep and honestly get away with it. That adaptability is the whole appeal.
It suits most face shapes and most hair types, though very fine hair benefits from some internal layering to avoid the lengths going flat. It’s probably the most versatile grow-out shape on this list — not the most architectural, but the most forgiving. For a broader look at everything sitting in this length territory, the Satinmane.com archive covers a lot of these transition lengths in detail.
What to say at the chair: “Bixie length — between my ear and chin — point-cut ends all through, and I want internal layers so it moves. No hard perimeter.”
Questions I Get About Growing Out a Pixie
How often should I be getting trims while growing out a pixie?
More often than you’d think — and more often than most stylists admit upfront. Every four to six weeks for the first three months, especially if you’re maintaining a specific shape like the French crop or the defined nape. After that, once you’re into a looser, longer shape like the bixie or shag, you can stretch to eight weeks. Skipping trims entirely to “save length” usually backfires because the shape becomes shapeless before the length arrives.
Is there a product I actually need during a pixie grow-out?
One good paste or pomade, honestly. Not six products — one. You need something with enough hold to direct the hair but not so much that it looks stiff. I’ve used the same pot of matte paste for three months during a grow-out and it covered every shape on this list. Salt spray is useful if you’re going the textured/wavy route. That’s genuinely all you need to understand about styling short grown-out hair before you buy anything.
When does the awkward stage actually end?
The honest answer is: there isn’t really an awkward stage if you’re actively shaping the grow-out with purpose. The awkward stage happens when you’re just letting it grow without any intentional trimming or styling. If you choose one of the shapes above and visit a stylist every five to six weeks, the grow-out passes through wearable shapes continuously — you just move from one to the next. Most people hit a shape they genuinely love somewhere between months two and four.
Can I grow out a pixie without regular salon visits?
Technically yes, but I’d be misleading you if I called it easy. The shapes that hold up longest without trimming are the bixie and the undone wavy crop — both are forgiving because their silhouettes are loose rather than precise. The French crop and the blunt bob will look overgrown after six weeks without attention. If you genuinely can’t get in regularly, choose a shape where the grow-out itself becomes the next shape — the soft taper to bixie progression handles that reasonably well.
The whole trick with hairstyles for growing out a pixie is that you’re not really “waiting” — you’re moving through a sequence of shapes. Pick one that matches your actual morning routine (be honest) and your hair’s natural texture, tell your stylist specifically what construction you want, and book the next appointment before you leave the chair. That last part sounds obvious and it’s the one people skip. Don’t skip it. Also, if you’re curious about what works specifically at shorter lengths and face shapes in this territory, the posts on growing out a pixie have more to dig into. Good luck — the other side really is worth it.