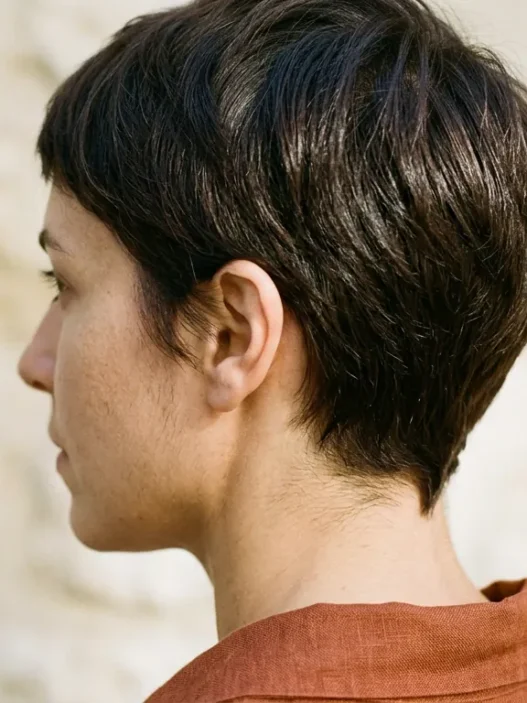











My hair sat on my shoulders like a helmet. I’d asked for a medium length cut, walked out of the salon thinking it looked fine, and then dried it at home and realised the whole thing had puffed into a solid block. Not volume. Weight. There’s a real difference, and it took me an embarrassingly long time to understand it. What I actually needed wasn’t a shorter haircut or a different style — I needed to know where the mass was sitting and how to move it out without destroying the shape I’d paid for.
This is that process. A specific, sequential way to remove weight from a medium length haircut for thick hair so it dries faster, sits flatter where it should, and doesn’t turn into a triangle by 3pm.
What We’re Working Through
Where the Bulk Sits
Thick hair doesn’t carry weight evenly. It pools. And it pools in the same four places almost every time: the nape, the mid-section underneath, the pocket just behind each ear, and — counterintuitively — along the perimeter. People attack the perimeter first because it’s what they can see, but the visible puff is almost never where the real problem starts. The real problem is underneath, where the hair has been stacking since the last cut and nobody’s been in there.
Understanding this before picking up anything sharp is the whole game. A low maintenance haircut that actually stays low maintenance is built on correct weight distribution, not just on a flattering length. So before we do anything, we identify.
Step 1: Map the Heavy Zones Before You Touch the Scissors
What you’ll need for this whole process:
- Sharp cutting scissors — smooth blades only, not thinning shears (I’ll explain why in a moment)
- A fine-tooth tail comb for sectioning
- At least six butterfly clips or duckbill clips
- A handheld mirror plus your bathroom mirror
- Clean, dry or slightly damp hair — not soaking wet
- Good overhead lighting or a ring light if you have one
- A spray bottle of water to dampen specific sections if needed
Start with dry hair — or towel-dry at most. Wet hair lies flat and tricks you into thinking there’s less bulk than there is. Dry, thick hair tells the truth. Stand with both mirrors so you can see the back, and use your hands to lift sections away from the head one at a time. You’re not cutting yet. You’re reading.
Press your palm flat against the nape. Does it feel dense, like there’s a mattress under there? That’s Zone One. Now lift the hair at the midpoint of the back of your head — around occipital level — and feel the interior. Thick? Sticky? That’s Zone Two. Tuck a finger behind your right ear and press. If the hair there folds stiffly against your neck, that’s Zone Three. And finally, hold the ends of your hair at the perimeter and notice whether they feel heavy and blunt-terminated or whether they move. Blunt and heavy means Zone Four needs attention too.
Mark where your heavy zones are. Seriously — make a mental note or even use a washable marker on your wrist to tick them off. We’ll go through them in order because the nape always comes first. If you skip to the perimeter and then come back, you disturb the work you’ve already done.
Step 2: Taking It From Inside the Nape
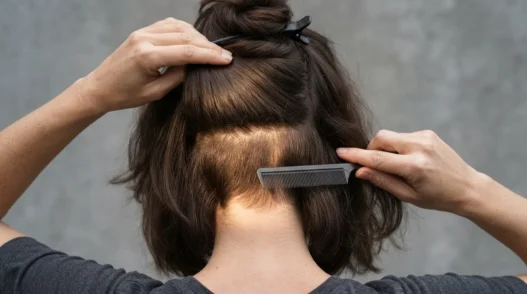
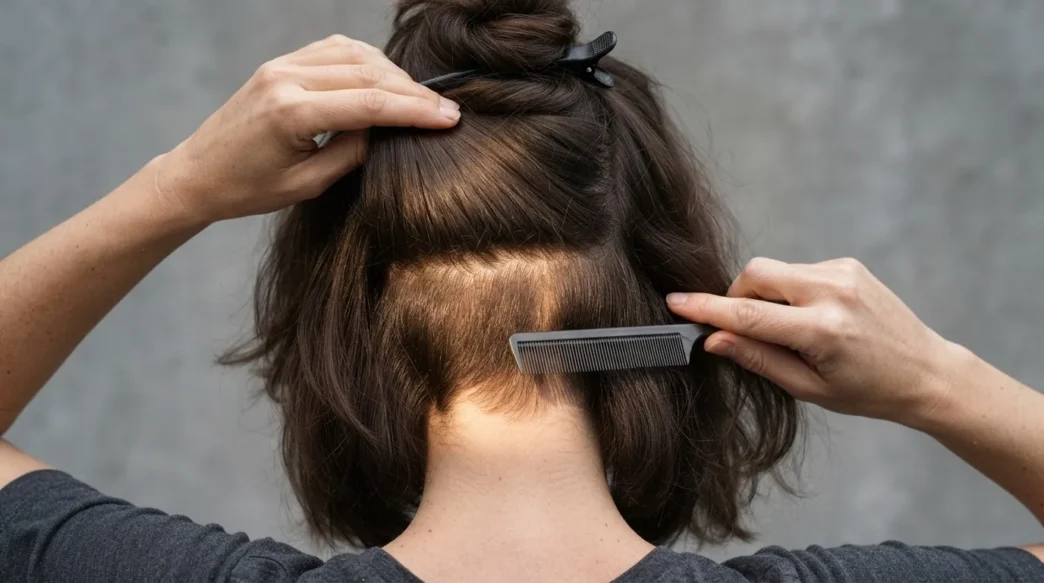
The nape is where thick hair absolutely loves to hide its bulk. Because it sits closest to the neck and gets compressed against collars and scarves, it builds up a dense underlayer that makes the whole back of a mid-length haircut push outward instead of falling. This is the zone that adds the most to drying time, too — I’ve shaved twenty minutes off my dry time by clearing it out properly.
Clip all of your hair up except the very bottom inch of the nape. Take that bottom inch, hold it out horizontally from your head — parallel to the floor — and look at how thick the section is in your hand. You want it to be about a centimetre deep when held taut. If it’s two centimetres or more, you have excess there.
Now — and this is important — you’re not going to cut the length. You’re going to point-cut into the interior of this section from underneath. Tilt your smooth cutting scissors so the tips are angled upward into the hair at roughly 45 degrees. Make small snipping motions, each one about a centimetre deep into the section, spaced about two centimetres apart across the width. You’re removing interior hair, not shortening the ends. The outside of the nape stays exactly as it is.
The mistake I made the first time: I used thinning shears across the nape because I thought they’d be gentler. They created a patchy underlayer that looked moth-eaten when the nape dried, and it took four months to grow out evenly. Smooth scissors with a point-cutting technique every single time — thinning shears should never touch the nape of thick hair.
Let the section down, shake it out, and feel it again. It should feel lighter and move more freely. You’ll notice the hair just above it now drops toward the neck instead of pushing out.
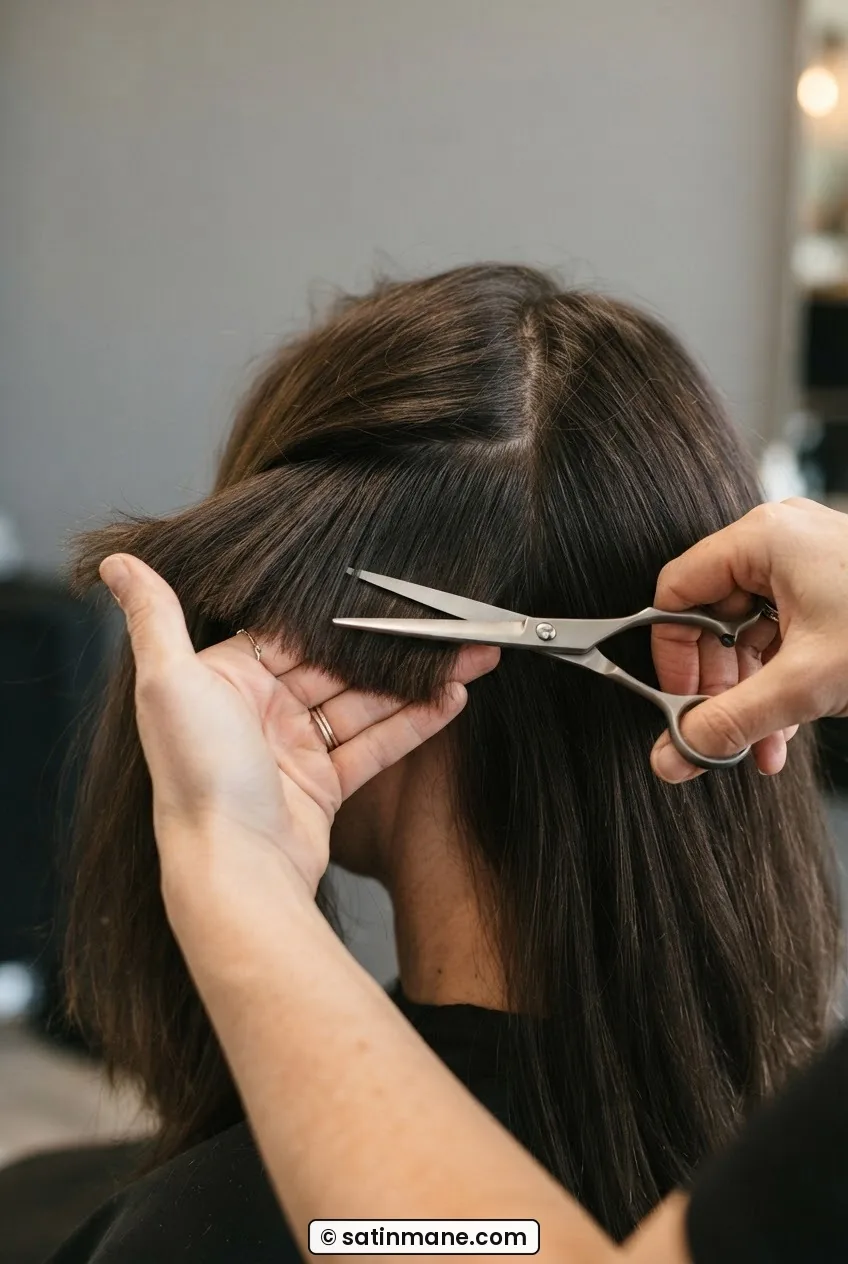
Step 3: The Mid-Section Underneath
Release one more inch of hair from your clips — so you now have roughly the bottom two inches of your hair down. Clip the rest back up. This middle zone is where most medium length haircut tutorials go wrong, because it’s invisible. You can’t see it in the mirror without really trying, and clients can’t see it at all when they’re sitting in a salon chair. So it gets skipped. And it is where the pyramid shape comes from.
Lift this section away from your head — she’s holding hers at roughly 90 degrees from the scalp in the photo below, which is the angle you want. The underside is now exposed. Look at how much interior hair is sitting in there.
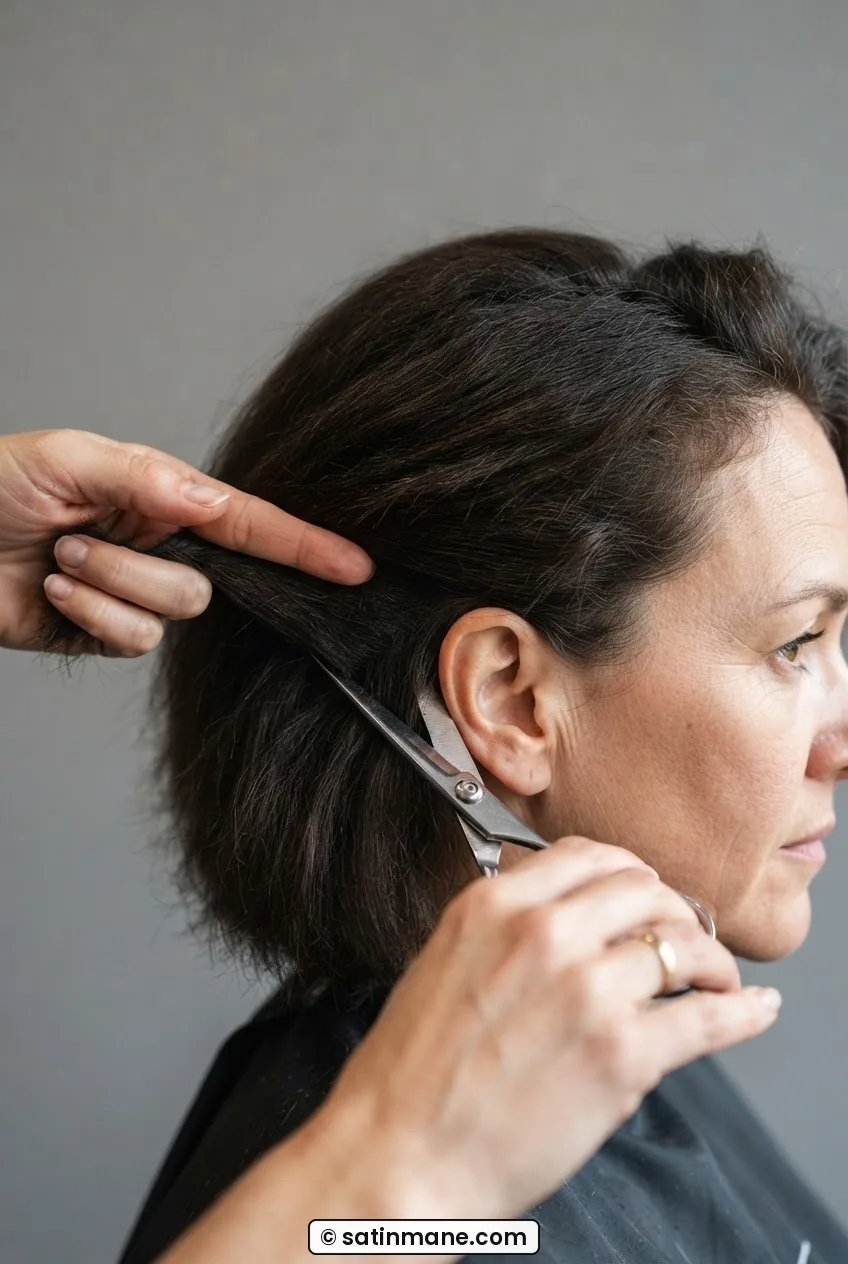
Using the same point-cutting technique from Step 2, work across this section from left to right. But here you go a little deeper — up to two centimetres into the interior, because the section itself is thicker and there’s more to move. Space your cuts slightly further apart than at the nape, about three centimetres between each entry point. You want to create interior channels — little rivers of lightness running through the hair — not to clear the whole layer.
The practical test: when you let this section fall and shake your head, you should feel the hair settle rather than bounce outward. That settling is the drying time dropping. When how hair structure affects moisture you’ll understand why interior density is the real culprit — it traps heat and water where a diffuser or blow dryer can’t reach it.
Now release all your hair. Stand back and look at the back in the double mirror. The nape and mid-section should already look noticeably less bulky — but don’t touch the top sections yet. We work from the bottom up, and we’re not at the top.
See the Interior Cut Done in Real Time
Step 4: Behind the Ears — the Forgotten Pocket
This one is my personal nemesis. The area directly behind each ear — that small triangular pocket where the hair wraps around the head before joining the back sections — is where my hair goes from “manageable” to “wearing a life vest.” It’s dense, it’s directional (the hair there grows at an odd angle), and it creates the width that makes a mid-length cut on thick hair look squat instead of sleek.
Section just that pocket on one side. Use your tail comb to take a vertical section from the top of the ear down, about three centimetres wide. Clip everything else out of the way. Hold this section out from the head — directly horizontal, pointing away from the ear. You’ll feel how solid it is. It’s like a little brick of hair.
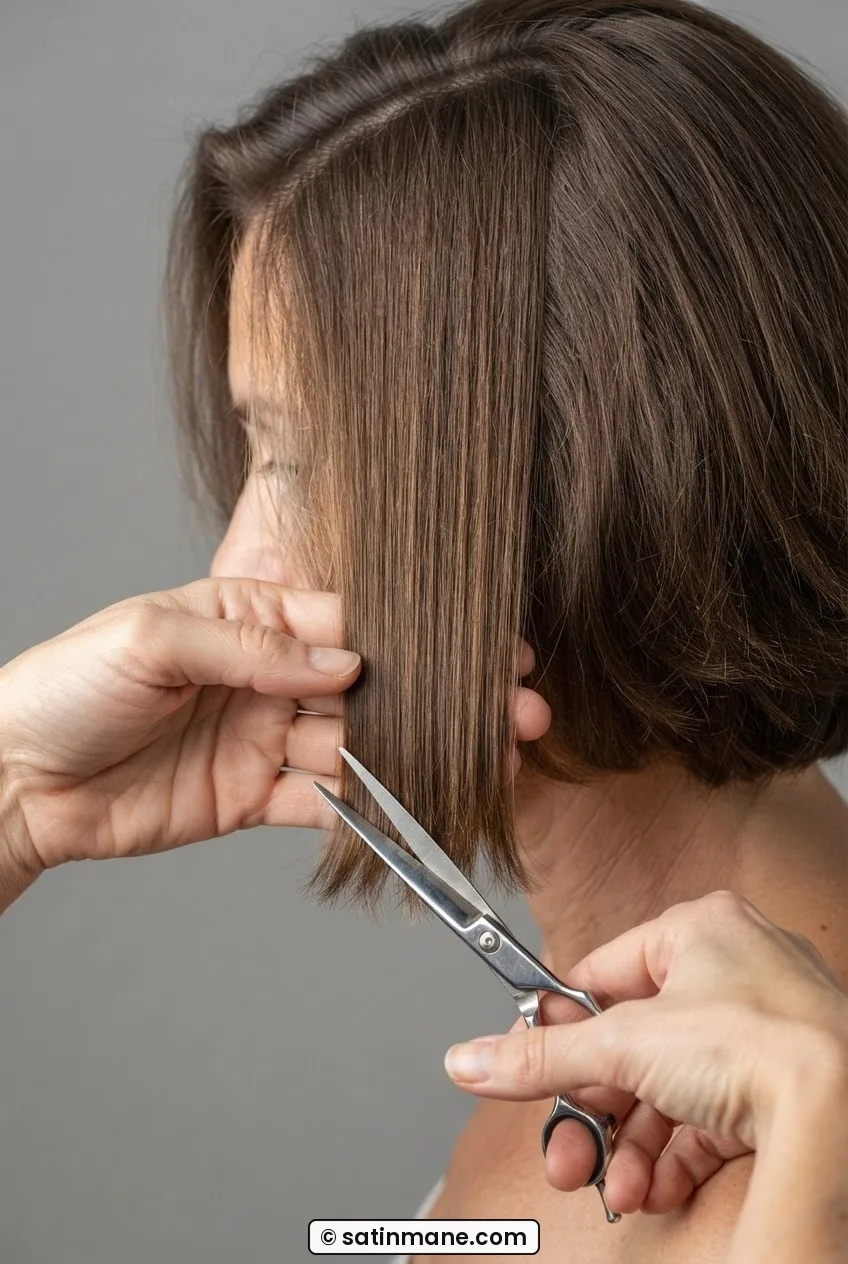
Point-cut into the underside of this section, tips of the scissors angled back toward the head (so you’re cutting into the interior from the outside edge). Make about four cuts across the width, evenly spaced. Then rotate the section slightly so you’re also cutting from the bottom edge. The goal is to break up the compactness, not to remove length.
Repeat on the other side. This is where symmetry matters — if you spend three minutes behind the right ear and thirty seconds behind the left, you’ll feel the imbalance when the hair dries. Take the same number of cuts, same depth, same angle. The face shape effect of this step is genuinely surprising. Shoulder-length cuts on thick hair that bunch here can look like they’re widening the face when actually it’s just this pocket of bulk. Clearing it restores the line — which is why face shape matters more than most people think when you’re working out where weight needs to come from.
Step 5: The Perimeter Line
Now — finally — we look at the perimeter. But we’re not doing what most people expect. We’re not shortening the hair or adding a new shape. We’re softening the weight line that builds up at the ends of thick hair.
Thick hair cut straight across at the perimeter creates a blunt shelf. That shelf is heavy and it swings outward as it dries, adding apparent width at the very bottom of the silhouette — which is exactly where you don’t want it. The solution isn’t a new cut. It’s removing that shelf while keeping the length.
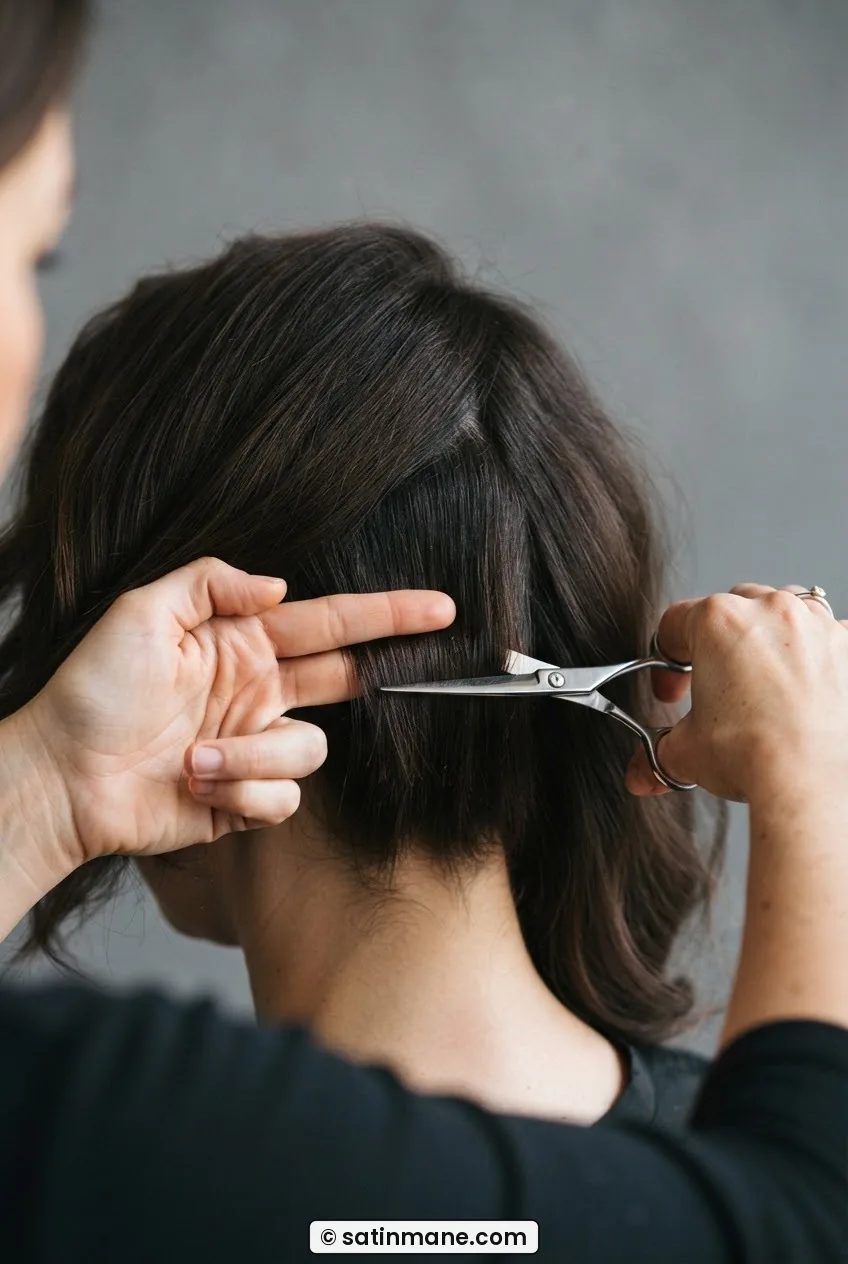
Work in small sections around the perimeter — front to back on each side, then across the back hem. Hold each small section of ends vertically (tips pointing at the floor) and use your scissors to point-cut upward into the ends. These aren’t deep cuts — maybe a centimetre into the ends at most. You’re just breaking the blunt line. The ends will still look full and healthy; they’ll just stop behaving like a plank.
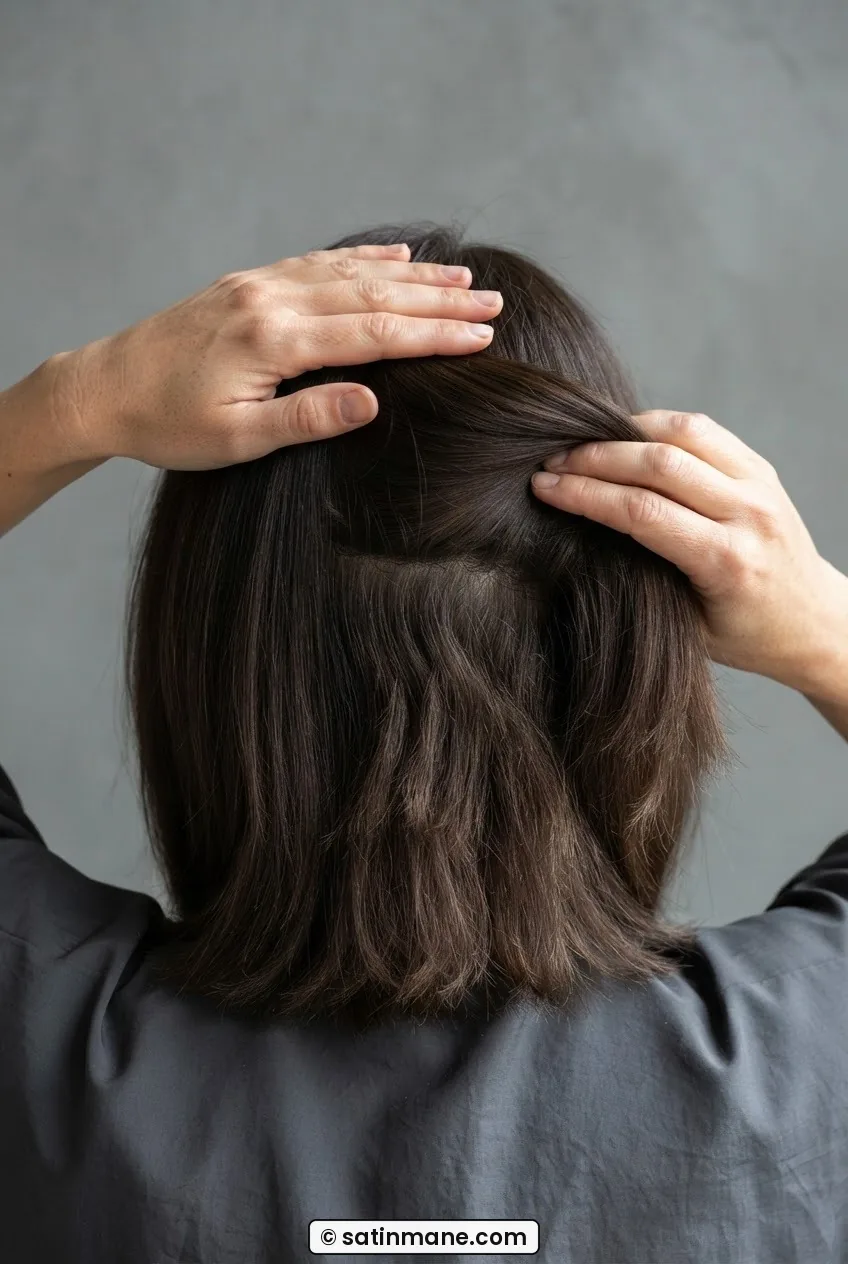
Look at the woman in this photo — see how her ends are being held vertically away from the head so the interior of the section is lit and accessible? That’s the angle you want. The scissors are working from below, tips pointing up into the ends, and the result is a softened perimeter that still has presence but stops building that outward shelf.
For anyone whose medium thick haircut also has a fringe or face-framing pieces at the front, apply the same vertical point-cutting to those ends only. Don’t touch the internal length of face-framing layers — just the very ends. And if you want to know more about how length choices around the face interact with shape, this piece on bob cuts for round faces covers the principle well even if your hair is longer.
You can also learn how point cutting thick hair ends affects texture long-term — the technique is worth understanding properly before you do it regularly.
Step 6: How Much Is Too Much
This step is a stop. An active, deliberate stop at a specific place.
There is one area you must never remove weight from on a medium length haircut for thick hair: the crown. The surface layer from the occipital bone upward is structural. It creates the silhouette the whole cut is built around. If you start point-cutting or texturising in here — even if it feels heavy — you will create gaps that show through the top of the hair, irregular patches that dry at different heights, and a general flatness that no amount of styling product fixes. I have done this. It took seven months to look normal again.
The rule I use: if I can see the section clearly without lifting anything, I don’t cut the interior. The crown is always visible. The nape and the underneath are never visible without effort. That’s your guide.
The same caution applies to the top layer on either side of the part. Thick hair needs that top layer intact for smoothness. The bulk lives underneath — always underneath — and that’s where the work stays. Once you’ve done the nape, the mid-section, the ear pockets, and the perimeter ends, you are finished. Put the scissors down.
Now dry your hair — or let it air dry fully — before you judge the result. This is another mistake people make: they look at damp hair after this process and think nothing happened, then grab the scissors again. Give it twenty minutes of air-dry or five minutes with a diffuser and you will see the difference. The silhouette will be narrower. The ends will move. The nape will sit against your neck instead of pushing away from it.
For women over 50 who carry their hair at this length, the impact of getting interior weight right is even more noticeable — the cut just behaves better day-to-day, which is exactly what the most wearable haircuts have in common regardless of length. And if after all of this you’re considering going shorter rather than working with the weight at medium length, then reading about how shorter cuts handle bulk on different face shapes is a genuinely useful next step.
The whole process — all six steps done carefully — takes about forty-five minutes at home, or about half that with a stylist who understands interior cutting. And asking your stylist for weight removal is a skill worth developing, because “take some weight out” means something very different to different people.
Questions I Get About This
Can I use thinning shears instead of point-cutting with smooth scissors?
I’d really avoid it, especially at the nape and behind the ears. Thinning shears cut randomly through layers and on thick hair they leave visible patches once the hair dries — particularly at the nape where the sections are dense and directional. Smooth scissors with point-cutting gives you control over exactly how deep you go and where the removed hair comes from. It’s slower but the result doesn’t have that chewed-through texture that thinning shears can leave.
How often does thick hair at medium length need weight removed?
For most people, every eight to ten weeks. That’s typically when the nape starts to build back up and the ear pockets get heavy again. If you’re only going to the salon every three or four months, the mid-section interior is usually what needs the most attention at each visit — that’s where the stacking happens fastest.
Will removing weight make my hair look thinner or less full?
Not if you work from the interior. The surface layer — what’s visible from the outside — stays completely intact. You’re removing hair from underneath that section, so the top looks exactly the same. What changes is that the whole mass sits differently: more downward, less outward. It actually looks fuller in some ways because it stops being one solid block.
Does this work on coarse thick hair as well as fine thick hair?
Yes, though coarse thick hair needs slightly deeper cuts at each entry point because the individual strands take up more space. Fine thick hair (high density but fine strand diameter) responds to very small cuts — go shallower than I describe above, about half a centimetre into each section, and check more frequently. The zones are the same either way; it’s just the depth that adjusts.
I tried this and my hair still dried with a lot of puff. What did I miss?
Usually it’s the ear pockets. That behind-the-ear zone is easy to underdo because the section feels awkward to hold and cut, so people rush it. Go back to Step 4 and spend twice as long there — really work across the full triangular pocket on both sides. The second most common reason is that the cuts weren’t deep enough in the mid-section: if you only went half a centimetre in on a dense section, you may not have moved enough mass to change the behaviour.
My hair sits completely differently now — and honestly, I didn’t need a new cut to get there. I needed to understand where the weight was living and move it out in the right order. The shape I already had was fine. It just needed breathing room.