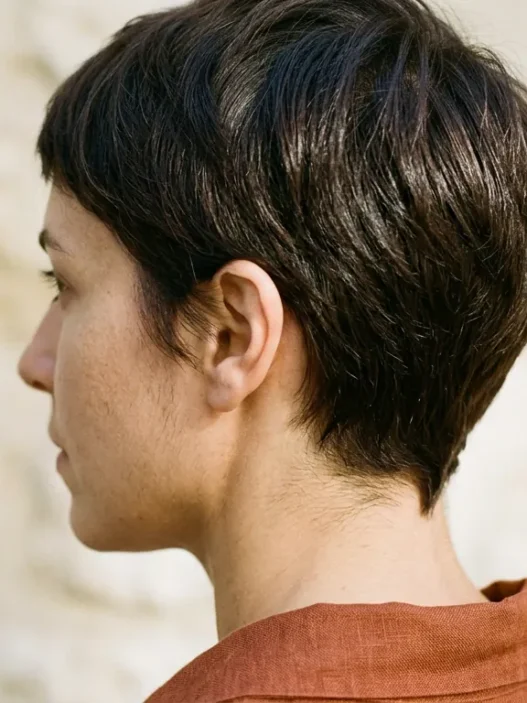













The first winter I had a lob, I wore it under a chunky turtleneck and pulled the sweater off at lunch to discover my hair had basically become a mushroom. The collar had folded the ends under so completely that the whole shape disappeared. I’d asked my stylist for something low-maintenance that worked year-round, and for six months of the year it absolutely did not. So I went back in, asked a lot of uncomfortable questions, and eventually figured out that the cut itself needed to account for what it would live inside all day.
This guide covers the full process — how the cut gets set in the morning and how the evening steps make the next morning shorter. Think of it as two halves of one habit. If you’ve been wondering whether a genuinely low-maintenance haircut is actually achievable at collarbone length, this is the answer.
What’s In This Guide — Collar to Collarbone
- What You’ll Need
- Step 1: Finding the Collarbone
- Step 2: Sectioning for Collar Clearance
- Step 3: Cutting for Where It Dries
- Step 4: Texturizing the Ends
- Step 5: Keeping It From Creeping Up
- Step 6: The Morning Routine That Takes Eight Minutes
- Step 7: The Evening Reset for Tomorrow
- Lob Questions Worth Answering
What You’ll Need
Nothing exotic. Most of this is probably already in your bathroom — or should be, once you’ve had a lob for more than a week and realized what it actually demands.
- Sharp cutting scissors (smooth blade, not thinning shears — those come later)
- Thinning shears or a texturizing razor
- Fine-tooth tail comb for sectioning
- Four to six duckbill clips
- A spray bottle with water
- A lightweight leave-in conditioner or detangling mist
- Sea salt spray or a texturizing spray — not a volumizing mousse
- A diffuser if you air-dry slowly, or just a standard nozzle if you blast quickly
- One wide-barrel wand (32mm) for the evening reset only
- A good mirror — ideally two, so you can see the back
I’d also add: patience, specifically for Step 3. That step takes longer than you expect the first time you do it.
Step 1: Finding the Collarbone
This sounds too basic to be a whole step. It isn’t. The collarbone is not one fixed point — it’s a curve, and your hair hits different parts of it depending on whether you’re standing, sitting at a desk, or turning your head to reverse a car. The problem with most textured lobs is that they’re cut to one length at one moment, and then spent the rest of their lives catching on collar edges at other moments.
Stand in front of your mirror in the shirt or sweater you wear most often — not your nicest one, just your Tuesday one. Press your index fingers into the center of your collarbone on each side. Now look at where your hair falls relative to those two points. If your hair is currently sitting on the collarbone rather than just past it, you’re in the fold-and-crease zone. The sweet spot for a lob that behaves under a standard crew neck is about 2cm below the collarbone’s center, graduating to about 1cm below at the sides, where collars tend to be higher and stiffer.
Mark this length with a clip on each side. Write it down or photograph it. This measurement is your anchor for everything that follows — change it later and you’ll redo the whole cut.
Step 2: Sectioning for Collar Clearance
Start with dry hair. I know that runs counter to everything you’ve been told — cut on wet hair, it’s easier to see, the line is cleaner. But a textured lob changes length as it dries, sometimes by as much as 2cm if you have any wave in it at all. Cutting wet means cutting a phantom version of the style, not the one that will actually live in your collar.
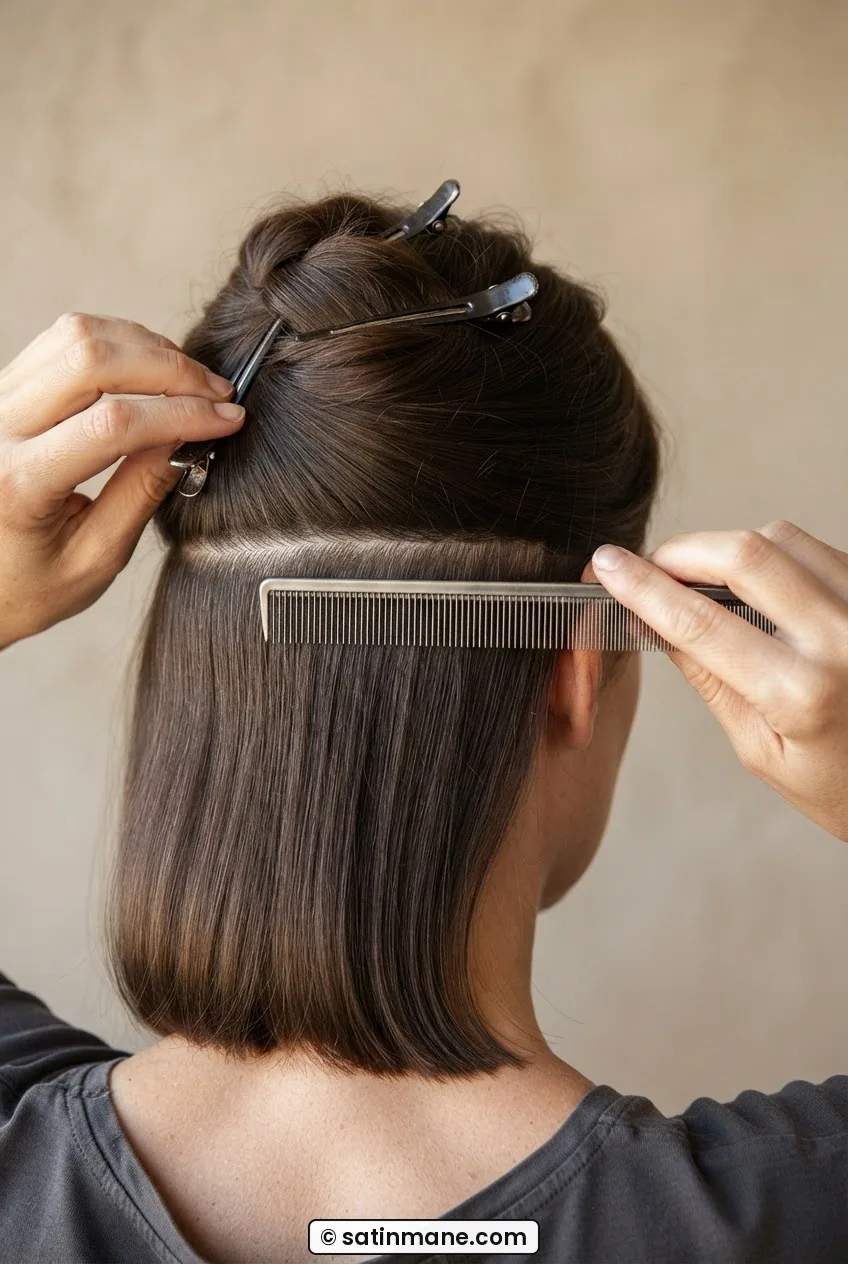
Use your tail comb to create a horizontal section about 2cm above the ear on both sides, pinning the upper hair out of the way. This bottom panel is your guide section — everything else will be cut in relation to it. Take a second horizontal section about 4cm higher, also clipped up. You’re working in three panels: the bottom guide, the mid section, and the top. Don’t rush past this. Good sectioning is the entire reason the cut looks intentional rather than like it happened in your kitchen (even if it happened in your kitchen).
Step 3: Cutting for Where It Dries
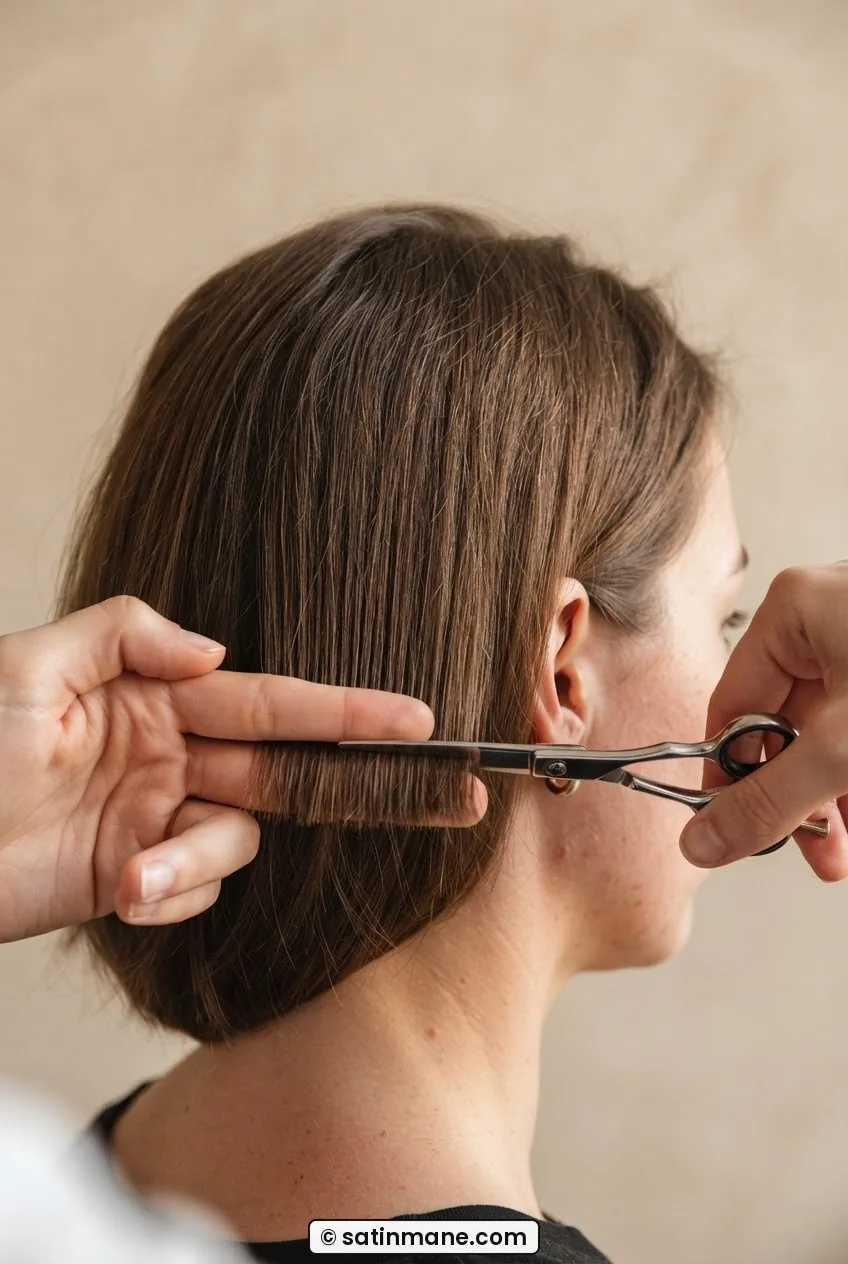
Release the bottom panel. Comb it smooth and straight down. Take a sub-section no more than 1cm thick — thinner sections let you see what you’re doing — and hold it between your index and middle fingers, keeping your fingers parallel to the floor. Cut straight across at your marked length. No angle yet. This is the foundation line.
Work across the back in 1cm sub-sections, always bringing each new section down to meet your guide. Once the back is done, move to the sides. Here’s where the collar-aware adjustment matters: angle your fingers very slightly — about 5 degrees, fingers tilted so the front sits 3mm longer than the back of each side section. This prevents the front pieces from curling stubbornly inward against collar edges when you’re moving around. It’s a tiny adjustment that changes the whole shape by end of day.
Mistake I made the first time: I cut the side sections completely horizontal, same as the back, because it felt more consistent. By 2pm those front pieces had rolled under my jacket collar into a sad little flip that looked nothing like the lob I’d planned. The 5-degree angle isn’t visible when the hair hangs free — but it saves you completely once a collar enters the picture.
Once all three sections have been cut to meet the guide, let everything down and look at the overall line. It should be clean but not perfectly uniform — little variations are fine, because the next step will handle those.
Step 4: Texturizing the Ends
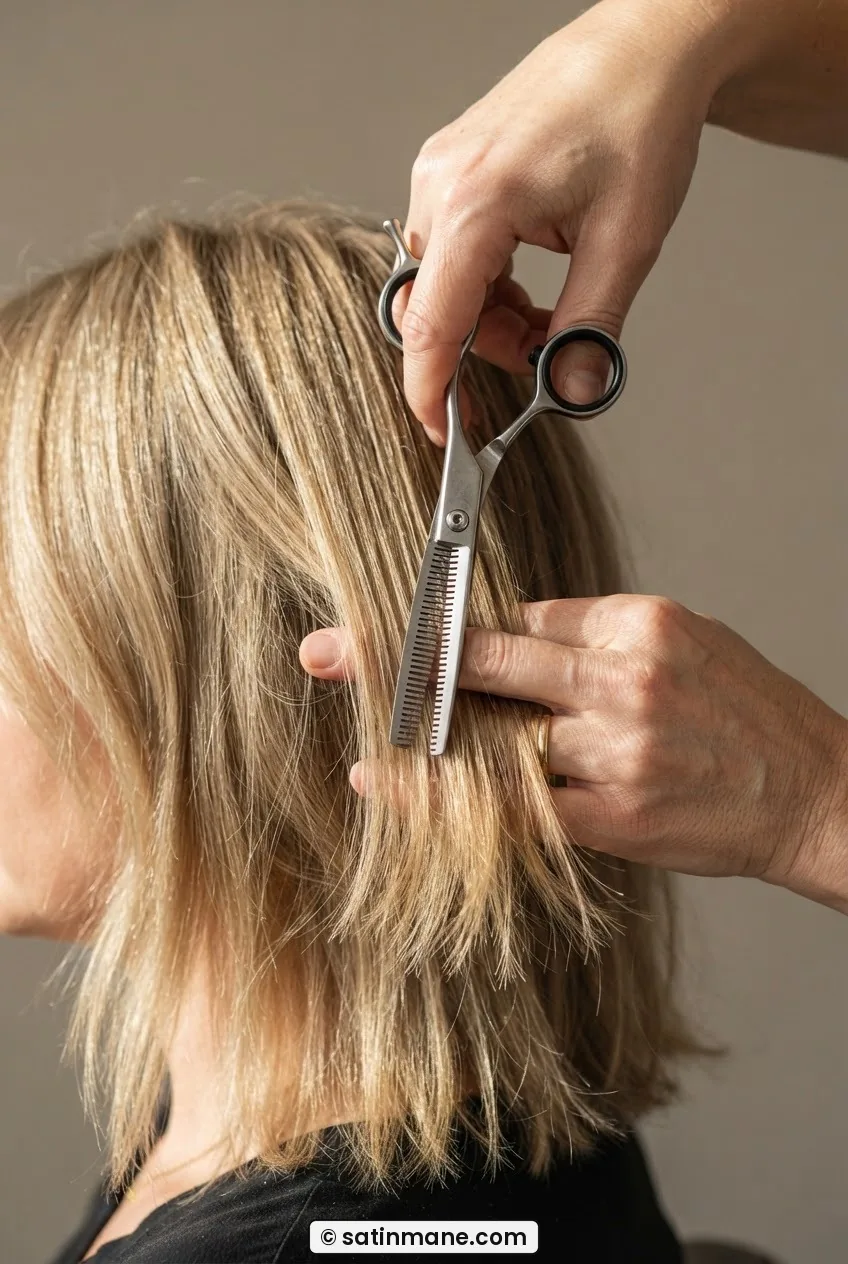
This is the step everyone skips, and it’s the one that separates a choppy lob haircut that actually moves from a blunt line that just sits there. Pick up your thinning shears. You’re going to point-cut into the ends — not across them, into them, with the shears pointing vertically toward the floor.
Take a section of about 3cm wide. Hold it taut but not stretched. Insert the thinning shears about 1.5cm up from the tip — not at the very end, but above it. Close them once. Move along about 2cm. Close again. You’re making notches, not removing length. The goal is to break up the blunt line so the hair catches light differently and doesn’t clump against a collar as a unified wall of weight. Look at how she’s holding her section in the photo below — that vertical angle is exactly what I mean. The shears are pointing straight toward the floor, not across the hair.
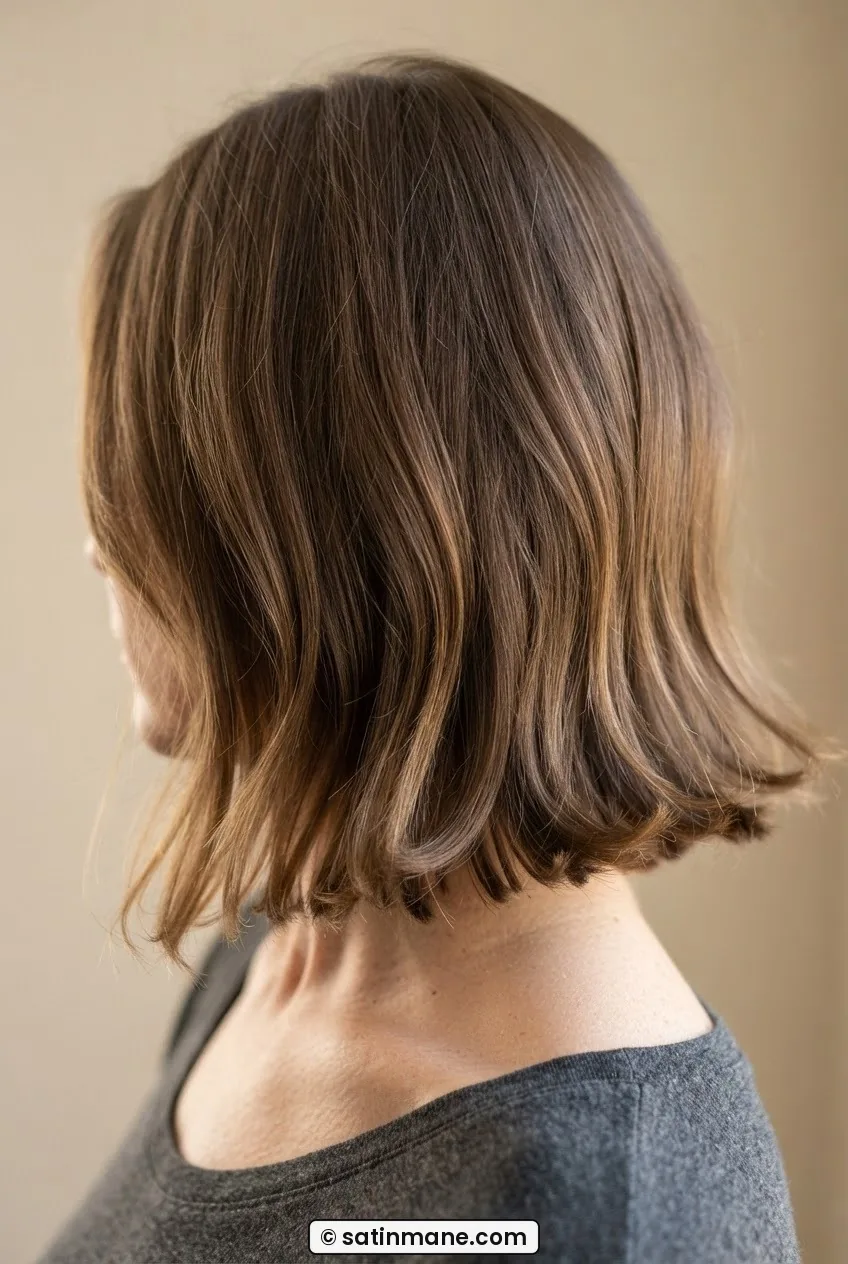
Work through the entire perimeter this way. For fine hair, be conservative — one pass is enough. For thick hair, you might want two passes, with the second one going a centimeter higher. If your hair is naturally wavy, you can go slightly more aggressive because the wave will soften any over-texturizing. For resources on managing this at different densities, the approach to bob hairstyles for fine hair covers the weight-distribution logic really well — it applies here too.
A Stylist Shows the Point-Cut Technique
Step 5: Keeping It From Creeping Up
Here’s something nobody mentions in glossy lob tutorials: hair shrinks. Not just as it dries, but over days, as the ends start to bend from repeated collar contact. A lob that sat beautifully at the collarbone on day one can look like a jaw-length bob by week three if the ends have been folded under enough times.
The fix is built into how you finish each wash day. Before the hair fully dries — when it’s still about 30% damp — take the ends and encourage them to curl outward, not under. Use your fingers, or wrap small sections loosely around a wide-barrel brush and aim the airflow downward. You’re essentially training the ends to fall away from the neck rather than toward it.
For the actual trim schedule: this length wants a trim every eight to ten weeks. I know that sounds more frequent than “low maintenance,” but the thing is that a textured lob that’s freshly trimmed needs virtually no styling. Let it go past twelve weeks and you’ll spend ten minutes every morning fighting the shape back into place. The math works out in your favor if you keep the appointment. Understanding how trim frequency affects hair length can help you figure out your own ideal schedule.

Step 6: The Morning Routine That Takes Eight Minutes
This is the first half of the daily habit. The morning routine only exists to refresh the shape — if Step 7 (the evening reset) happened the night before, this entire section takes under ten minutes. If it didn’t, add another five.
Mist the hair lightly with water from your spray bottle — not soaking, just enough to release the sleep shape. Work a small amount of leave-in conditioner through the mid-lengths and ends, avoiding the roots. Flip your head over and scrunch the ends upward gently, then flip back and let everything fall naturally. Now hit it with the diffuser on medium heat for about four minutes, keeping the airflow pointing down along the hair shaft, not up. This seals the cuticle and reduces the frizz that makes collar contact worse.
Finish with one pump of texturizing spray — just into the mid-lengths, not the roots. Scrunch once. Done. The entire point is that you’re not fighting the cut; you’re just reminding it of what it already wants to do. She’s got her hair styled exactly like this in the photo below — that effortless separation in the ends doesn’t come from product, it comes from the cut doing its job.
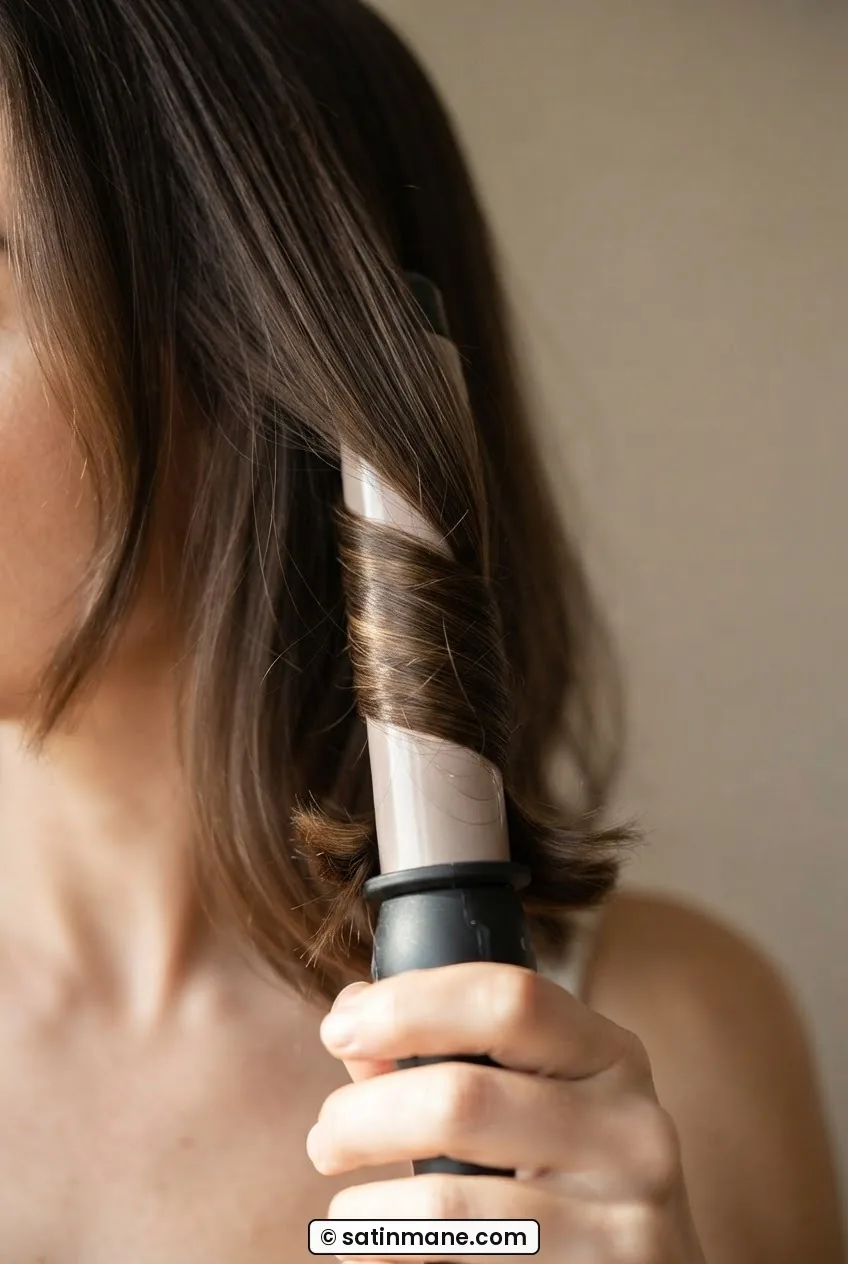
If you’re getting dressed in a turtleneck or high-collared coat that morning, do one extra thing: tuck a silk scarf around your collar before you pull the garment over your head. Slide it out once the top is on. It sounds fussy but it takes four seconds and completely eliminates the fold. Silk against hair creates almost no friction — understanding the friction difference explains the physics if you’re skeptical.
Step 7: The Evening Reset for Tomorrow
This is the second half — the half that most people skip because it happens at 9pm and seems optional. It is not optional. It’s what makes the morning short.
After a day of collars, coats, and whatever your commute threw at it, the ends of a lob need resetting before sleep. If you sleep on them as-is, you wake up with bends that take ages to coax out. Takes about five minutes, and you can do it in front of whatever you’re watching.
Run the wide-barrel wand (32mm) through the bottom third of the hair only — not the roots, not the mid-section. Take sections about 4cm wide, wrap each one loosely around the barrel, hold for five seconds, release. You want a soft bend, not a curl. Work from the back outward to the sides. The goal is to set the ends away from the neck so they’re already positioned correctly when you wake up.
Then — and this is key — sleep on a silk or satin pillowcase. Not because of some elaborate beauty ritual, but because cotton pillowcases create exactly the friction that re-folds your ends overnight. Spend eight hours undoing what you just spent five minutes setting, and the morning routine doubles. The pillowcase is load-bearing.
If this is new territory and you’re still deciding whether collarbone length is even right for you, the breakdown of bob haircuts for women with nothing to maintain covers the full spectrum from jaw to shoulder — worth reading before you commit to a length. And if you’ve been struggling with a mid-length cut that keeps losing its shape through growing out, the notes on mid-length layering for fine hair address exactly that problem.
Lob Questions Worth Answering
Does a textured lob work on very straight, fine hair?
Yes, but it needs more aggressive point-cutting than you’d expect. Without texture, fine straight hair reads as a blunt line at collarbone length — all the collar problems double because the ends form a flat, unified edge that catches on everything. Go conservative on length removal and aggressive on the texturizing shear passes. The lob actually works brilliantly for this hair type once the ends are properly notched.
How is a textured lob different from a choppy lob haircut?
Technically they’re siblings, not twins. A choppy lob usually refers to visible, deliberate internal layers and a more disconnected shape — great for thick hair that needs weight removed. A textured lob keeps more of a single-length base but uses point-cutting and thinning shears at the perimeter to break up the bluntness. The result is softer and generally works across more hair types. Both are low maintenance; the textured version just requires slightly less product to look done.
Can I cut a textured lob on myself, or do I need a stylist?
The perimeter cut (Steps 2 and 3) is genuinely easier with a second pair of hands — seeing the back of your own head accurately enough to cut a straight guide line requires either a very good two-mirror setup or a lot of practice. The texturizing step (Step 4) is absolutely doable on yourself; it’s forgiving and hard to ruin. My honest recommendation: go to a stylist for the initial cut and length setting, then maintain the texture at home between appointments.
What face shapes does this length actually flatter?
Collarbone-length hair with texture is genuinely flexible — it works for oval, heart, and square face shapes especially well because the movement at the ends draws the eye down and out, softening any strong jaw or forehead width. Round faces do best with the length sitting slightly past the collarbone rather than on it, which prevents the hair from widening the face at its widest point. The angle cut in Step 3 (front slightly longer than back) naturally creates a slight elongating effect regardless of face shape.
How do I keep it from looking flat by mid-afternoon?
Two things. First, skip heavy products — a sea salt spray or texturizing spray at the mid-lengths only, applied to slightly damp hair, gives the ends something to grip so they don’t collapse. Second, the evening reset (Step 7) is what actually solves this: ends that have been given a soft bend overnight arrive at morning with shape already built in, so they hold longer through the day. If you’re consistently losing shape by noon, the answer is almost always in the evening routine, not the morning one.
The result I actually got: my lob now survives a full coat-wearing day, two tube rides, and a crewneck at dinner without looking like it’s been through any of that. The morning routine genuinely takes eight minutes. The evening reset means I barely touch it before I leave the house. Both halves matter — but if I could only keep one? Keep the evening. It’s the one that makes everything else shorter.