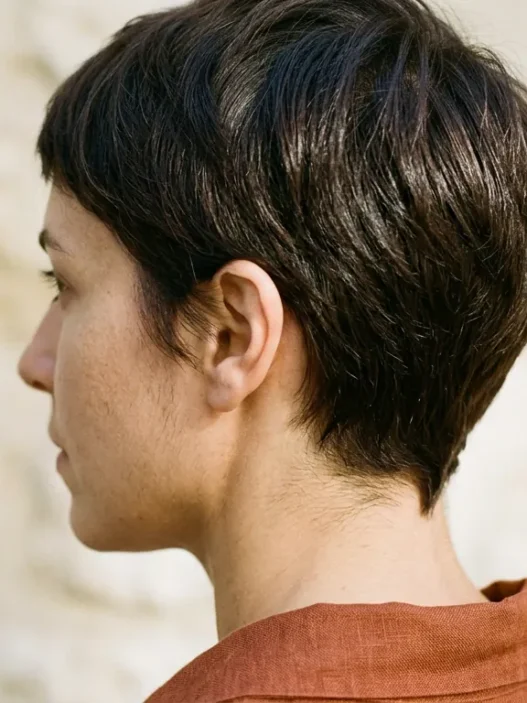













I cut my own chin-length bob for the first time on a Tuesday morning with a pair of fabric scissors and a YouTube video playing on my phone propped against the mirror. It was not a success. But that failure taught me more about where the weight needs to sit — and where the perimeter needs to break — than any salon appointment ever had. I have refined the process through probably eighteen cuts since then, and the version I’m sharing here is the one that consistently gets it right, even solo, even one-handed, even in a bathroom with north-facing light and a mirror that steams up every five minutes.
What’s In This Tutorial
- Why I Started Cutting My Own Chin-Length Bob
- What You Actually Need
- Step 1: Washing and Rough-Drying to the Real Length
- Step 2: Sectioning the Crown
- Step 3: Setting the Guide Length
- Step 4: Where the Weight Comes Out
- Step 5: Softening the Perimeter
- Step 6: Cutting the Fringe
- Step 7: Drying It the Way You Actually Will
- What It Looks Like When It Goes Wrong
- How It Behaves on Day Two and in Week Seven
- Questions I Get About This
Why I Started Cutting My Own Chin-Length Bob
Chin-length hair has a very specific problem: it grows out fast and the moment it drops even half a centimetre past where it belongs, the whole shape collapses. The perimeter goes from sharp and intentional to just… long-ish. I was getting trims every five weeks and it was expensive and inconvenient and honestly, a trim is not a complicated thing once you understand what you’re trying to preserve. The shape of a chin bob is almost entirely about the perimeter and the weight line. Get those two things right and the rest takes care of itself.
If you’ve been looking at hairstyles for short hair and keep coming back to this specific length, you already know what I know: there is something about chin-grazing hair that is deeply flattering in a way that is almost impossible to explain. It frames the face without hiding it. It has movement without mass. And a well-cut version of it behaves better on day two than almost any other length.
What You Actually Need
Keep this list short. I spent years buying things I didn’t use and ignoring the one thing that actually matters — the scissors.
- Sharp haircutting scissors — not kitchen scissors, not fabric scissors, actual ones with both finger holes intact. A decent pair runs about £20–£30 and is worth every penny. I use hair-cutting scissors that are specifically designed for dry or damp cutting.
- A wide-tooth comb for sectioning and one fine-tooth comb for the fringe
- Sectioning clips — at least four, ideally six
- A hand mirror (the kind you hold behind your head — non-negotiable for checking the back)
- A spray bottle filled with water
- Your usual styling product — you need the hair to behave exactly as it will in real life
- A diffuser or round brush, depending on your texture
- Good lighting — if your bathroom light comes from above, drag a lamp in from somewhere else
That’s genuinely it. No special sectioning systems, no DIY cutting guides with elastic bands. Just the tools and your hands.
Step 1: Washing and Rough-Drying to the Real Length
Wash your hair and rough-dry it to about 80% dry. Not soaking, not fully styled. The reason is simple: wet hair stretches, and if you cut it wet you will almost always cut more off than you mean to. Rough-drying first shows you the hair’s actual weight distribution — where it wants to curl under, where it’s going to sit heavier, where it lifts away from the head. That information is everything.
Once it’s rough-dried, comb through it with no product. Let it hang as naturally as it can. Stand directly in front of your mirror with both feet flat on the ground and your chin level. Posture matters here in a way that sounds fussy but isn’t. If you tilt your head even slightly, you will cut an asymmetrical line and spend ten minutes convincing yourself it’s intentional.

Step 2: Sectioning the Crown
This is the step people skip and then wonder why their result looks choppy and disconnected. Sectioning takes four minutes and saves you from a cut that has two different weights happening in the same head of hair.
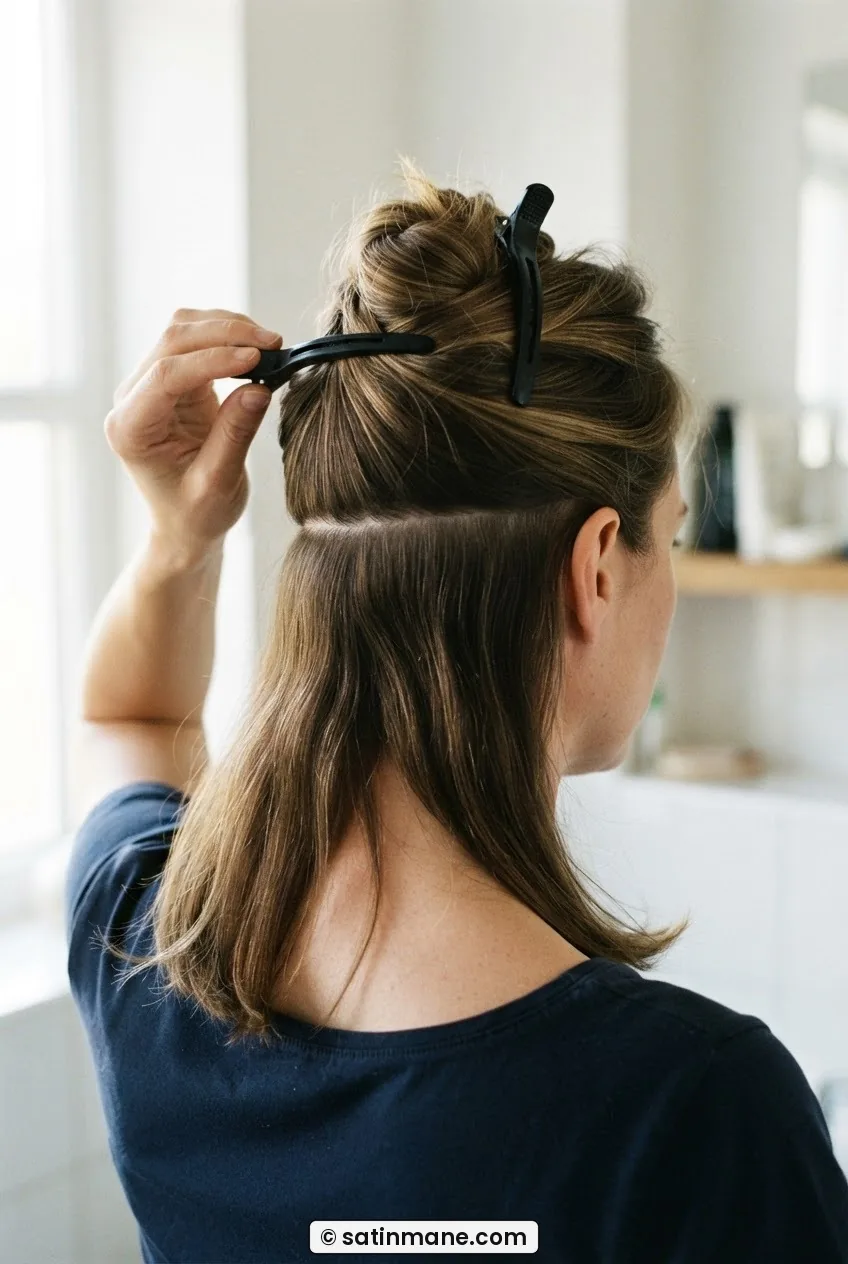
Part the hair from ear to ear across the top of the head — roughly where a headband would sit. Everything above that line goes up and is clipped to the crown. You’re left working with just the underneath section first. That lower section is the foundation. It sets the length that everything else will follow down toward.
Now take that lower section and split it once more down the centre back. You now have three working sections: left side, right side, and centre back (this last one stays loose for now). Clip the sides away. You’re starting at the back because the back is the hardest to see and the most important to get right before you touch the front.
Step 3: Setting the Guide Length
With the centre-back section hanging loose, comb it straight down. This is your guide. The cut I am describing lands at the chin — not below it, not at the jaw hinge, but at the actual point of the chin when you hold your face level. Use your fingers to pinch the hair at that point. Look at it in your mirror. This is where you will cut.
Hold the scissors horizontally — completely horizontal, not angled up or down. The blades are parallel to the floor. This is a blunt guide length and it needs to be exact because every other section will be brought down to meet it. Make the cut in one clean pass, not a series of nervous little snips. Nervous snipping creates a notched, uneven line that is very difficult to fix without taking more length.
The guide you’ve just cut is probably only about a centimetre of hair — the very centre-back strand. That’s right. It is your reference point, not a finished cut. Everything comes to find it.
Step 4: Where the Weight Comes Out
Now release the side sections, one at a time. Working on the left side first: comb the hair straight down, take a thin slice from the front of the section, and bring it back to meet your guide at the centre back by pulling it behind the ear. Cut it at the guide length. This is the over-direction technique — pulling hair away from where it grows to get a graduated line that’s longer at the front than the back. If you don’t want graduation (if you want a completely blunt one-length cut), don’t pull it back — just let it hang where it falls and cut straight across at guide length.
For a classic French-style chin bob with a tiny bit of length at the front — the kind that angles from slightly below the chin at the front to just above the nape at the back — you want a 15-degree pull-back. Not dramatic. Just enough to create a gentle diagonal. This is what makes the chin-length bob feel face-framing rather than blunt and blocky. It softens round faces and gives angular faces somewhere for the eye to travel. I write about this in more detail in my guide to bob hairstyles for fine hair, because the graduation works especially hard when the hair is fine and needs visual weight at the perimeter.
Repeat on the right side. Then compare the two front pieces — hold them together in front of your face and check they match. They almost never do perfectly on the first pass. Take the longer side down to match the shorter.

Step 5: Softening the Perimeter
Now release the crown section. Comb it down over the work you’ve done beneath it and you’ll see the two lengths sitting next to each other — the cut perimeter below and the uncut length above. The top layer should fall to the same length or just slightly shorter (if you want a little internal layering for movement and less bulk) than the guide.
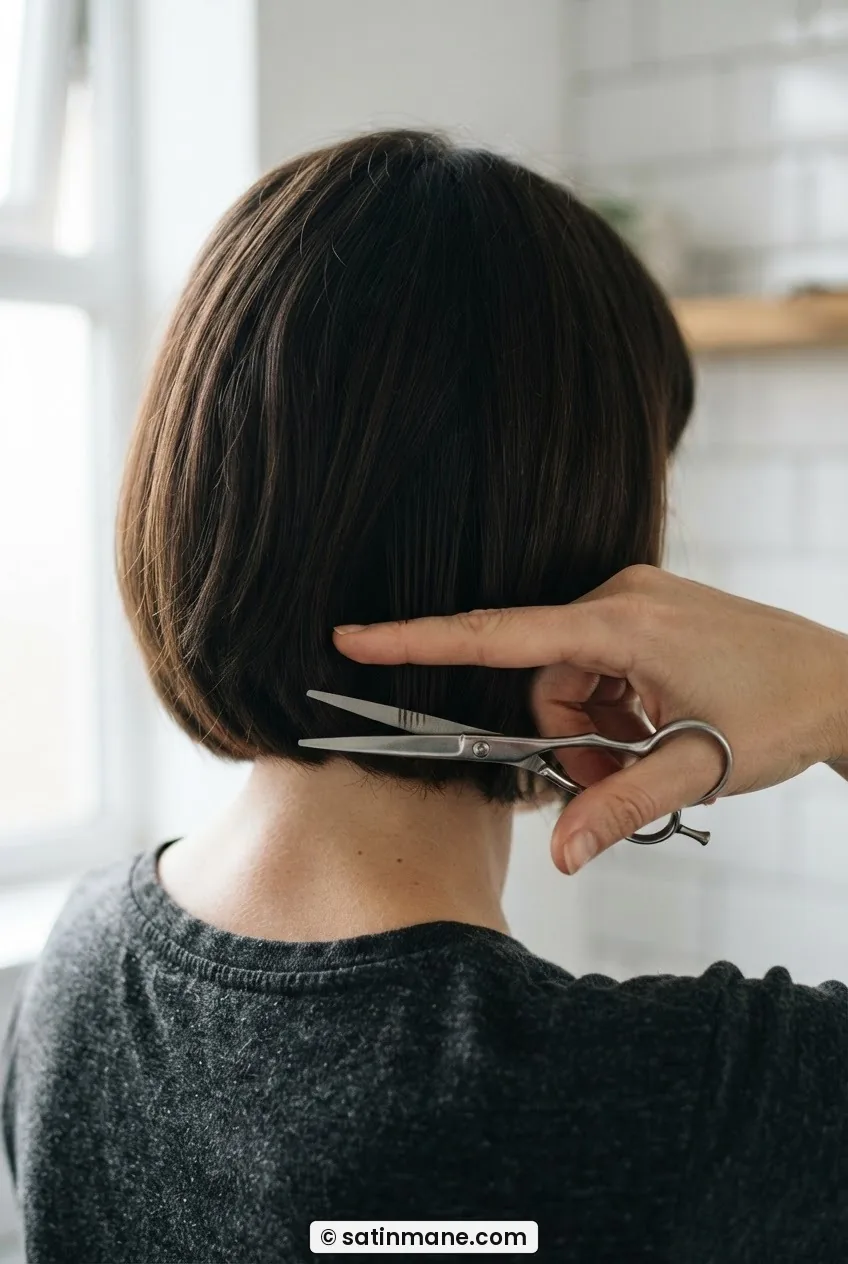
Here’s where texture enters. A completely blunt cut is beautiful on thick, straight hair. On wavy or fine hair it can feel heavy and flat, like a wig. To prevent that, hold the scissors vertically — completely vertical now, not horizontal — and point-cut into the ends. The blades face up toward the ceiling, you open and close them against the perimeter in short quick movements. You are not cutting length, you are removing the hard line. The result is a perimeter that has some texture and movement built in, so it doesn’t just sit there looking solid.
Go lightly. This is the step where less is always more. You can always go back and remove more of the blunt line, but you cannot put it back once it’s gone. Look at the woman in the image here — see how the ends have that slight irregular softness to them rather than a ruler-sharp line? That texture at the perimeter is doing a huge amount of work in making the whole cut look deliberately styled rather than home-done.
Step 6: Cutting the Fringe
Only do this step if you already have a fringe. If you don’t have one and are thinking about adding one — please do that at a salon the first time. A fringe is a commitment and getting the placement wrong changes the proportions of the whole cut. But trimming an existing fringe is well within reach at home.
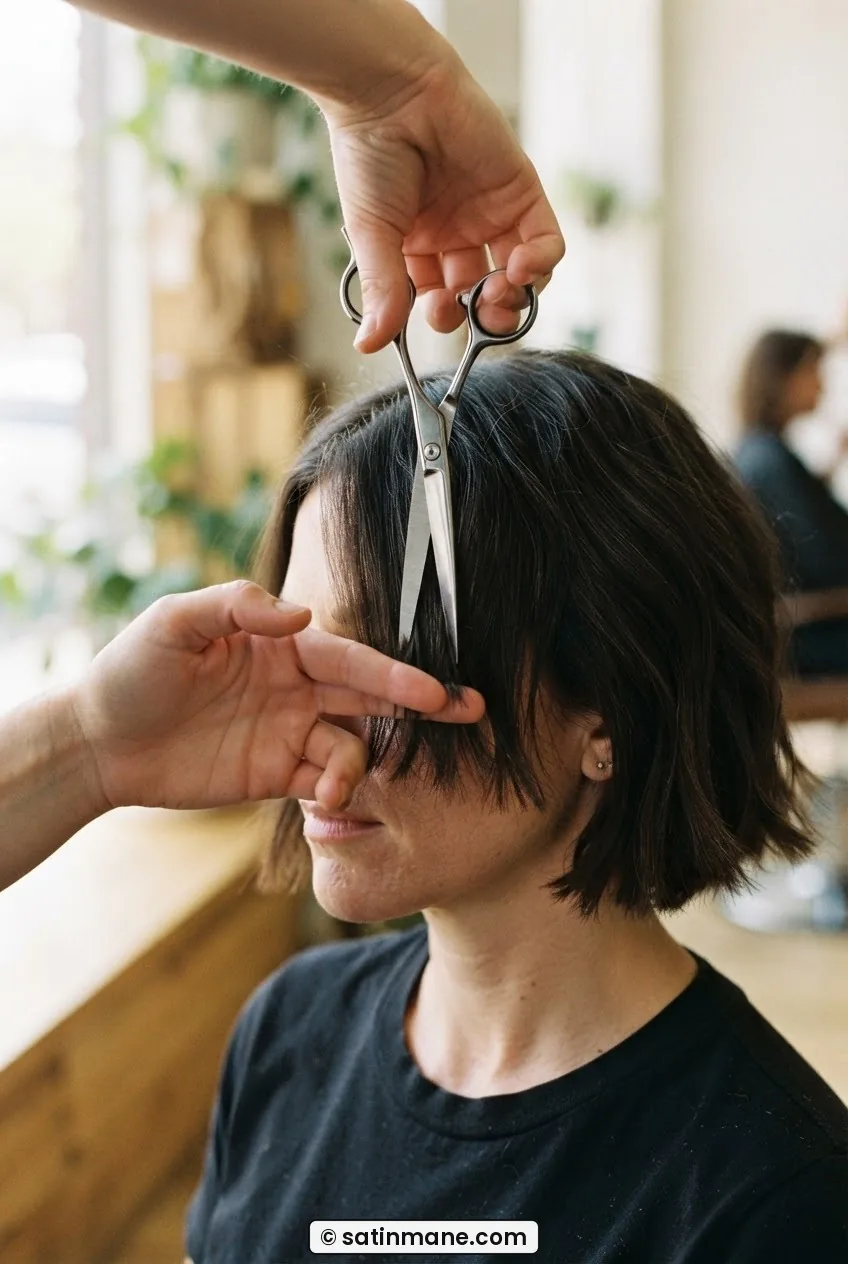
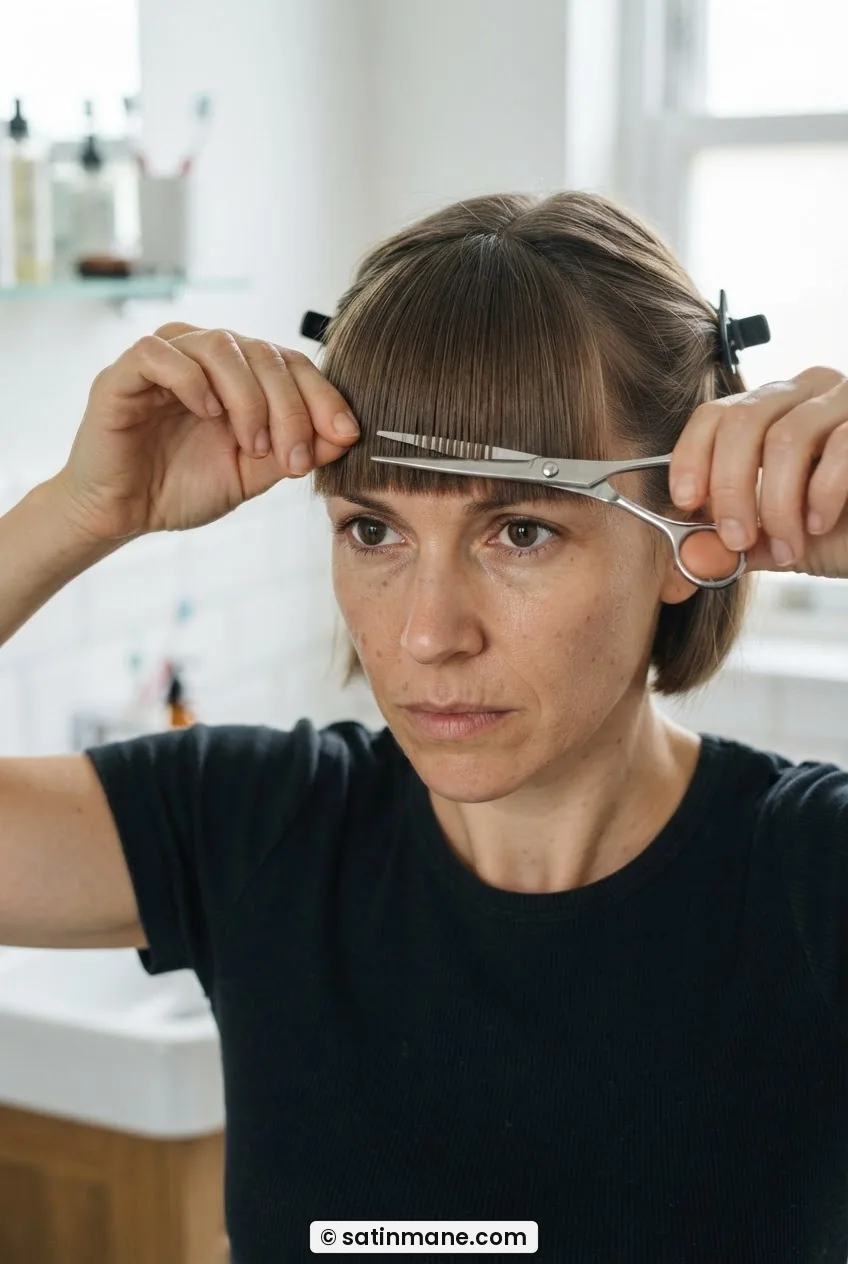
Separate the fringe section from the rest of the hair. For a soft, curtain-style fringe — the kind that works beautifully with a chin bob — take a triangle from the centre front of the hairline, about 5cm deep from the front. Clip the rest away. Comb the fringe straight down over the face.
Do not cut it wet. I know that feels counterintuitive, but a wet fringe will spring up considerably when it dries, and you will lose more length than you intended. Rough-dry it to its natural lay first. Then hold it between your index and middle fingers — the same two-finger method you’d use for any cut — and slide your fingers down to where you want the fringe to end. For a soft fringe that works with a chin-length cut, that’s usually somewhere between the brow and the lash line. Hold that, breathe, cut across in one horizontal pass. Then point-cut the edge very lightly to soften it. Curtain fringe trimming is genuinely helpful for visualising the section shape if you’re unsure.
Step 7: Drying It the Way You Actually Will
This is the step nobody tells you about and it matters enormously. Dry the hair exactly as you will dry it every other morning. If you air-dry, let it air-dry. If you use a round brush, use the round brush. The reason is that the cut needs to be assessed in its real state, not in the perfectly blow-dried state you might have when you’re being careful. A chin-length bob that looks perfect when meticulously dried but gaps at the nape when it’s air-dried on a Tuesday is not a good cut for your real life.
Once it’s dry, check the following: Does the perimeter sit evenly when you shake your head and let the hair fall? Is one side visibly heavier than the other? Does the back feel balanced when you check it with the hand mirror? If anything looks off, address it now — small adjustments are easy; big corrections are not. And do them dry. Cutting dry hair shows you the truth.
This final dry-state check is also where you’ll see whether the point-cutting worked. If the ends still look hard, go back with vertical scissors and soften them further. If they look too thin or wispy, that’s the over-point-cutting problem — remember it for next time and take it slower. For more on how different textures behave at this length, the post on hairstyles for growing out a pixie has a good section on managing the chin-length stage and what to expect from the hair as it settles into the shape over the first few weeks.

What It Looks Like When It Goes Wrong
The biggest mistake I made — and I made it at least three times before I learned — was cutting the crown section before I had properly finished the base. I released it too early, saw the length sitting there, and trimmed it to match. What I didn’t account for is that the crown section, when it’s released and hanging, sits about 1.5cm longer than it actually is due to the way the hair layers over the top. I cut it to match the visual, which meant I actually cut it shorter than the under-section. The result was a weird stepped look at the back — heavier below, lighter above, with no connection between them. Fix: finish the under-section completely before you even unclip the crown.
Another common one: cutting with the hair slightly damp rather than rough-dried. The hair looks longer when wet. You cut to what you think is chin length and when it dries it sits at the jaw hinge — which is fine if that’s what you wanted, but if you wanted a true chin length you’ve lost about a centimetre you didn’t mean to lose. I have done this. I have done it twice. Rough-dry first, every time.
A third one specific to one-handed bathroom cutting: not checking the back until the very end. Use the hand mirror after every major step — after the guide, after the sides, after releasing the crown. Don’t wait. If the back is uneven and you only catch it at the final step, it’s much harder to correct because you’ve already built layers on top of it.
How It Behaves on Day Two and in Week Seven
Day two is when you really see what you’ve done. The hair has slept on, lost some of its freshly-dried perfection, and is behaving like it actually behaves. This is usually when I spot any asymmetry that I missed while carefully drying it on cut day. If there’s a small unevenness, I fix it while the hair is dry on day two — it’s much easier to see and correct without the distraction of actively styling.
By week three the cut will have settled. Chin-length hair grows fast — faster, it seems, than any other length I’ve ever had. You’ll feel it starting to lose its shape around week four or five. The front pieces drop past the chin and the intentional line softens into something more vague. Some people love this in-between stage; I find it maddening. I trim again at week five or six to snap it back.
Week seven is the real test of the cut’s quality. If the shape still has some logic to it at week seven — if you can still see the intention in the perimeter even though it’s grown — then you cut it well. A poorly cut chin bob just looks longer and worse. A well-cut one looks like it grew out gracefully into something that almost works as a jaw-length style.
If you’re over fifty and wondering whether this length works for you, the short answer is: yes, and often better than it works for younger women. The weight at the perimeter provides structure that lifts the jawline visually. The short haircuts for women over 50 guide covers this in some detail, and the chin-bob section specifically is worth reading alongside this tutorial. Face shape also plays a part in how the graduation should be angled — for round faces, slightly more length at the front creates the illusion of length in the face; more detail on that at the round face guide here. And if you’re dealing with fine hair and worried the weight line will fall flat, try volumising techniques as a daily routine alongside this cut — it genuinely changes how the whole thing sits.
Questions I Get About This
Can I do this on curly or wavy hair?
Yes, but the approach changes. Curly hair needs to be cut dry because when it’s wet it appears significantly longer than it actually is — sometimes several inches longer depending on the curl pattern. The guide length still works as a concept, but take off less than you think you need to and check the dry result before you go any further. Wavy hair can be cut rough-dried in the same way as straight hair.
How much do I need to point-cut to avoid the blunt look?
Less than you think. Six to eight light vertical snips along the perimeter on each side is usually enough to take off the hard edge. You’re aiming for maybe two to three millimetres of irregularity, not a heavily textured or choppy result. If you’re working toward something more like a shaggy French bob with visible texture, that’s a different process that involves internal layers, which I’d tackle in a separate session once the perimeter is established.
What if my hair parts naturally in the middle — does that affect the cut?
A natural centre part is actually easier to work with for this method because the two sides are symmetrical reference points. Dry the hair with your natural part in place before you start sectioning, and maintain that part throughout. If your natural part is slightly off-centre, account for it — don’t fight it. Cutting against a natural part means the finished cut will always want to spring back to where the hair actually parts, and you’ll see the unevenness every morning.
How often will I need to redo this?
Every five to six weeks if you want the chin length to stay precise. Every eight weeks if you’re okay with it sitting slightly below the chin by the end of the cycle. I do a full cut every five weeks and a very light tidy-up of the fringe at week three. Once you know the process it takes about twenty minutes — sometimes less if the hair is being cooperative.
The first time I got this right — properly, all the way through, including a fringe that dried flat and even — I stood in front of the mirror for a longer-than-reasonable amount of time just checking the line. It looked like I’d paid someone. The weight sat exactly at my chin, the point-cutting had given the ends this slight informality that stopped the whole thing looking stiff, and the fringe was — finally — the right length. That’s what you’re aiming for. It’s achievable. It just takes the right sequence and a decent pair of scissors.